- If you’re unable to rename a specific folder in Windows, first ensure that it is not currently in use.
- Make sure to disable the “Controlled folder access” feature on your PC.
- Consider booting your PC in a clean boot state to check if a third-party app or program is causing the issue.
Try Basic Fixes
- Make sure the folder is not in use: You may have difficulty renaming a folder on your PC if it is already open in another program. To avoid this, cycle through all of your open apps and programs and close any that may be using the folder you’re trying to rename.
- Scan for malware: The presence of malware on your PC can also cause such anomalies. To overrule this possibility, scan your PC for malware using Windows Defender or a reputable third-party antivirus program.
- Install Windows updates: Windows 11 may be having trouble renaming folders due to a bug. If that’s the case, installing pending software updates should help.
Fix 1: Restart Windows Explorer
Windows Explorer is a process that provides the Graphical User Interface (GUI) for File Explorer. If the process encounters any issues, File Explorer may not function properly and you might have trouble renaming folders. Here’s what you can do to fix it.
Step 1: Press Ctrl + Shift + Esc on your keyboard to open the Task Manager.
Step 2: In the Processes tab, right-click on the Windows Explorer process and select Restart .

Fix 2: Disable Controlled Folder Access
Controlled folder access is a feature in the Windows Security app that helps protect your files and folders from unauthorized changes. This feature may occasionally prevent you from renaming folders. You can temporarily disable it to see if it helps.
Step 1: Open the Windows Security app on your PC and navigate to the Virus & threat protection tab.
Step 2: Click on Manage ransomware protection .

Step 3: Toggle off the switch for Controlled folder access .

Fix 3: Get Ownership of the Folder
You might be unable to rename a folder on Windows due to a lack of necessary permissions. To fix this, you should get ownership of the folder you’re trying to rename by following the steps below.
Step 1: Right-click on the folder you wish to rename and select Properties .

Step 2: Under the Security tab, click the Advanced button.

Step 3: Click on Change next to the Owner.

Step 4: Type in your username in the text field and click the Check Names button. Then, click OK .

Step 5: Check the box that reads Replace owner on subcontainers and objects . Then, hit Apply followed by OK .

Fix 4: Try Clean Boot
There’s a chance that a third-party app or program running in the background is interfering with Windows and causing such problems. To verify this, you can boot your PC in a clean boot state where it only runs with essential apps and services.
Step 1: Press the Windows key + R to open the Run dialog, type in msconfig , and press Enter .

Step 2: Under the Services tab, mark the box that reads Hide all Microsoft services and click the Disable all button.

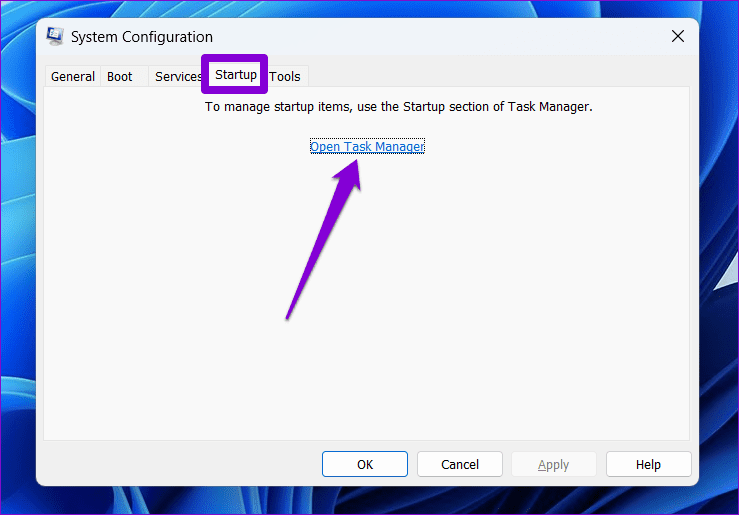
Step 3: Switch to the Startup tab and click on Open Task Manager .
Step 4: In the Startup tab, select a third-party app and click the Disable button at the top. Repeat this step to disable all third-party apps and programs.

Restart your PC to enter the clean boot state and see if you can rename folders. If this method works, you’ll need to look through any recently installed apps and programs and remove them.
Was this helpful?
- Running the printer troubleshooter in Windows is an effective method for fixing such issues.
- Temporarily stopping the Print Spooler service can help you remove printers without encountering errors.
- If the printer still won’t remove, try uninstalling the printer driver and software.
Fix 1: Run the Printer Troubleshooter
Start by running Windows’ built-in printer troubleshooter to see if it can detect and resolve any pending printing errors.
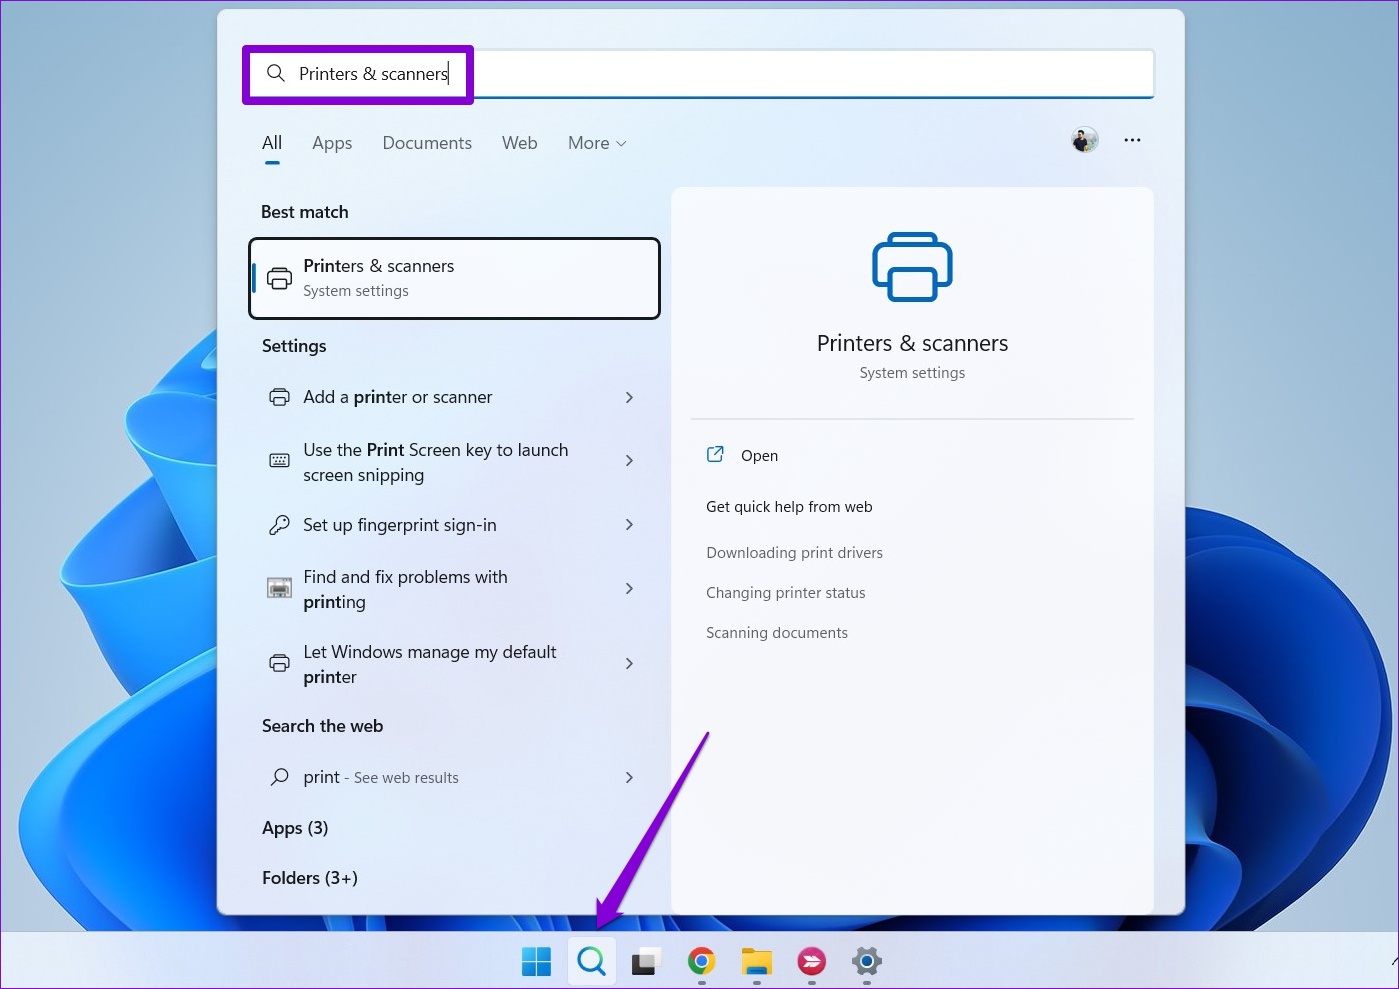
Step 1: Click the search icon on the taskbar, type printers & scanners , and press Enter .
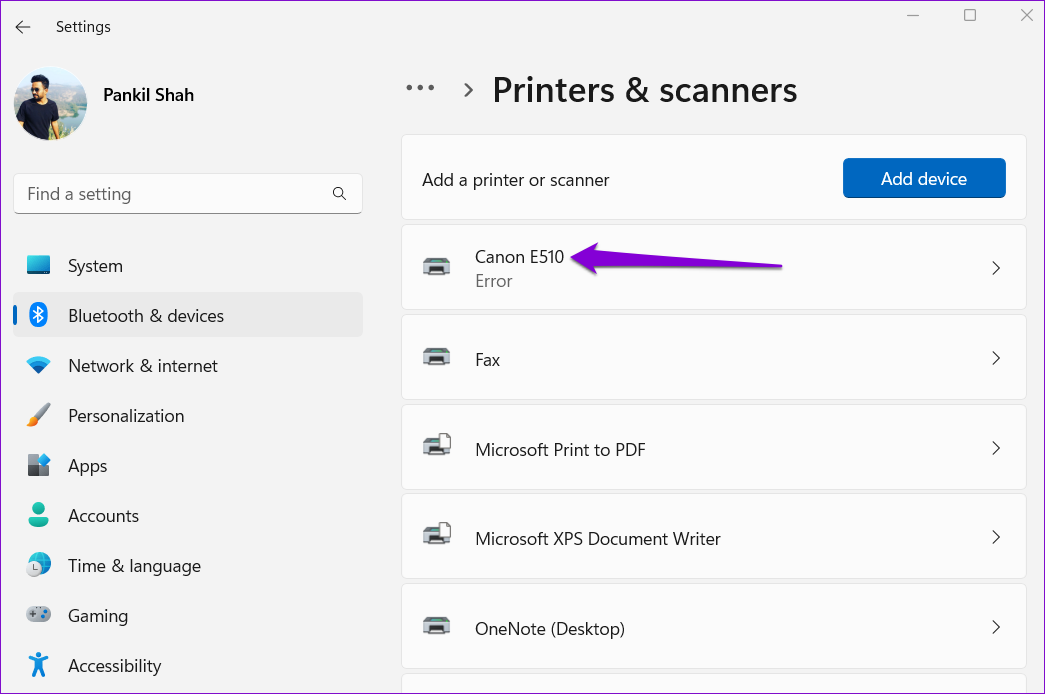
Step 2: Select your printer.
Step 3: Click on Run the troubleshooter .

Windows should automatically detect any issues with the printer and fix them. Following that, you should be able to get rid of the printer.
Fix 2: Remove the Printer From the Print Server Properties
There are several ways to remove a printer in Windows 11. So, if you can’t remove the printer from the Settings app or Control Panel, remove it from the Print Server Properties in Windows.
Step 1: Press the Windows key + S to open the search menu. Type printers & scanners and press Enter .
Step 2: Under Related settings, click on Print server properties .

Step 3: Go to the Drivers tab, select your printer, and click Remove .

Step 4: Select Remove driver and driver package and hit OK to confirm.

Fix 3: Stop Print Spooler Service
Print Spooler is a critical service that handles printer interactions on Windows. If that service interferes with the removal process, disable it temporarily to see if it helps.
Step 1: Press the Windows key + R to open the Run dialog. Type services.msc in the box next to the Open field and press Enter .
Step 2: In the Services window, scroll down to locate Print Spooler . Right-click on it and select Stop .

After stopping the Print Spooler service, remove the printer again.
Fix 4: Uninstall Printer Driver
Device Manager is a useful tool that lets you manage and troubleshoot all your hardware devices from one place. You can also use it to delete an old printer from your PC. Here’s how.
Step 1: Right-click on the Start icon and select Device Manager from the menu.

Step 2: Open the View menu at the top and select Show hidden devices .

Step 3: Double-click on Print queues to expand it. Right-click on your printer and select Uninstall device .

Fix 5: Remove Printer Software
If you’ve installed a dedicated app or software for your printer, it could also obstruct the removal process. To avoid this, first uninstall that app or software before trying again.
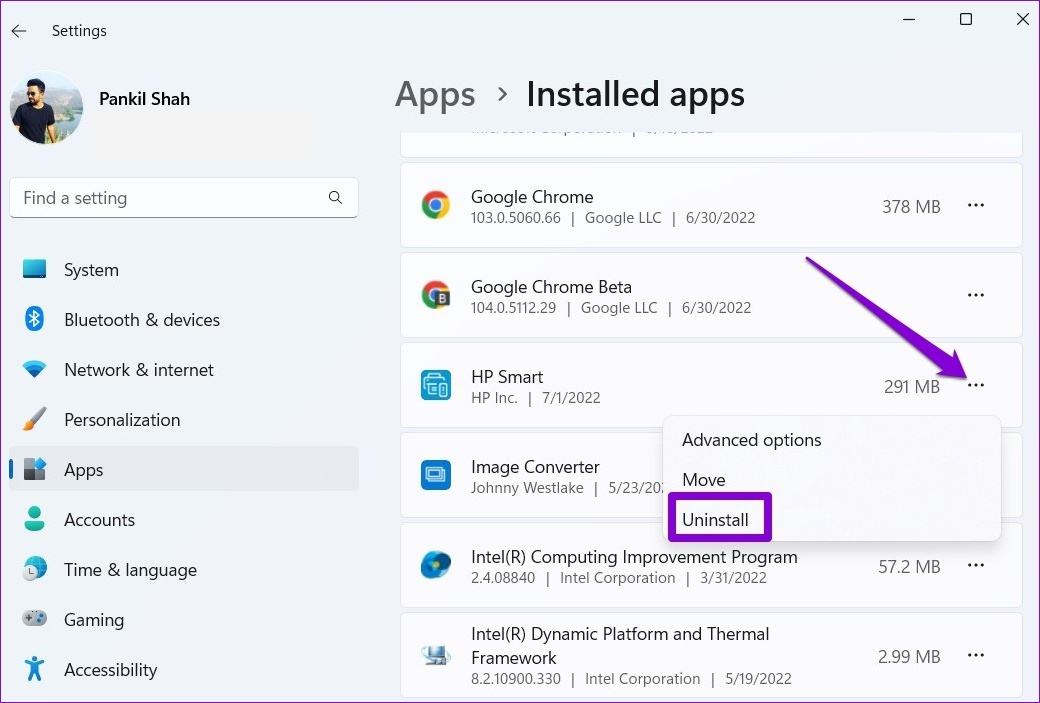
Step 1: Right-click on the Start icon and select Installed apps from the list.

Step 2: Locate the printer app on the list. Click the three-dot menu next to it and select Uninstall .
After removing the app, you can remove the printer from the Settings app or Device Manager.
Fix 6: Use the Registry Editor
Windows may not remove the printer due to corrupt registry keys associated with it. To fix it, remove those corrupted registry keys by following the steps below.
Step 1: Press the Windows key + R to launch the Run dialog. Type regedit and press Enter .
Step 2: Paste the following path in the address bar at the top and press Enter .
HKEY_LOCAL_MACHINE\SYSTEM\CurrentControlSet\Control\Print\Printers
Step 3: Locate the printer you wish to remove and click on Delete . Then, select Yes to confirm.

Restart your PC after this, and you should be able to remove your printer without a problem.
