Windows makes multitasking feel like a cakewalk. You can keep several windows open at the same time and use any of them. Improving on the same feature, Windows 10 offers a split-screen functionality . What is the split screen feature in Windows 10? And how to use it? Find the answer here.

You don’t need to buy any third-party split software if you want to work on two or more windows simultaneously in Windows 10. That is possible with the baked-in feature . You can have up to four windows on the same screen.
Let’s get started and know how to multitask in Windows by splitting the screen.
What Is Split Screen in Windows 10
Typically, if you want to work with more than one window on your computer, you will resize it manually to suit your needs. To make the adjustment process easier, you can let Windows split the screen automatically. With split-screen functionality, you can have 2, 3, or 4 windows open and visible simultaneously. So split screen is a feature to display two or more programs on the same screen without resizing them manually or adjusting their dimensions manually.
When two windows are split, one will occupy the left 50% of the screen, and the other will take the right 50%.

If there are three windows, one window on either left or right side will occupy 50% screen space and the other two will each take the top and bottom of the remaining area.
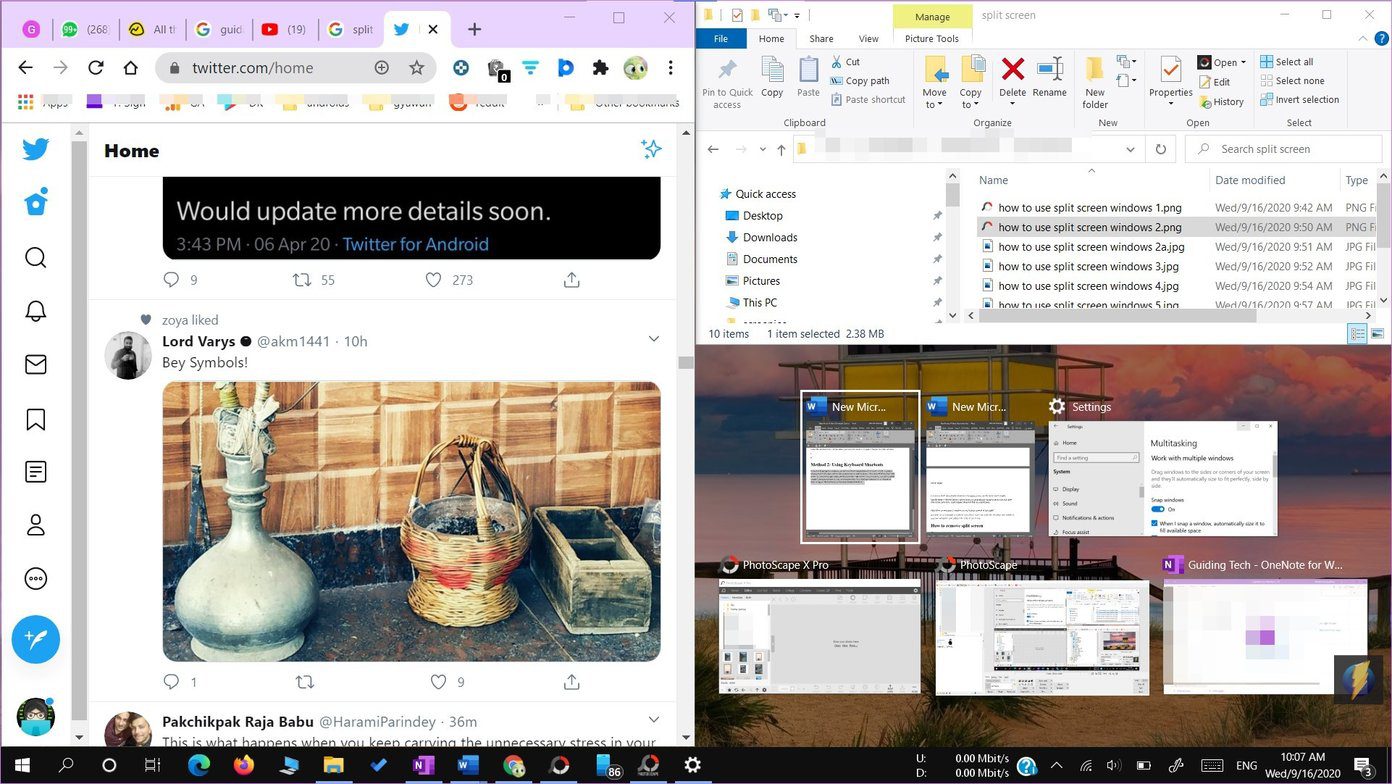
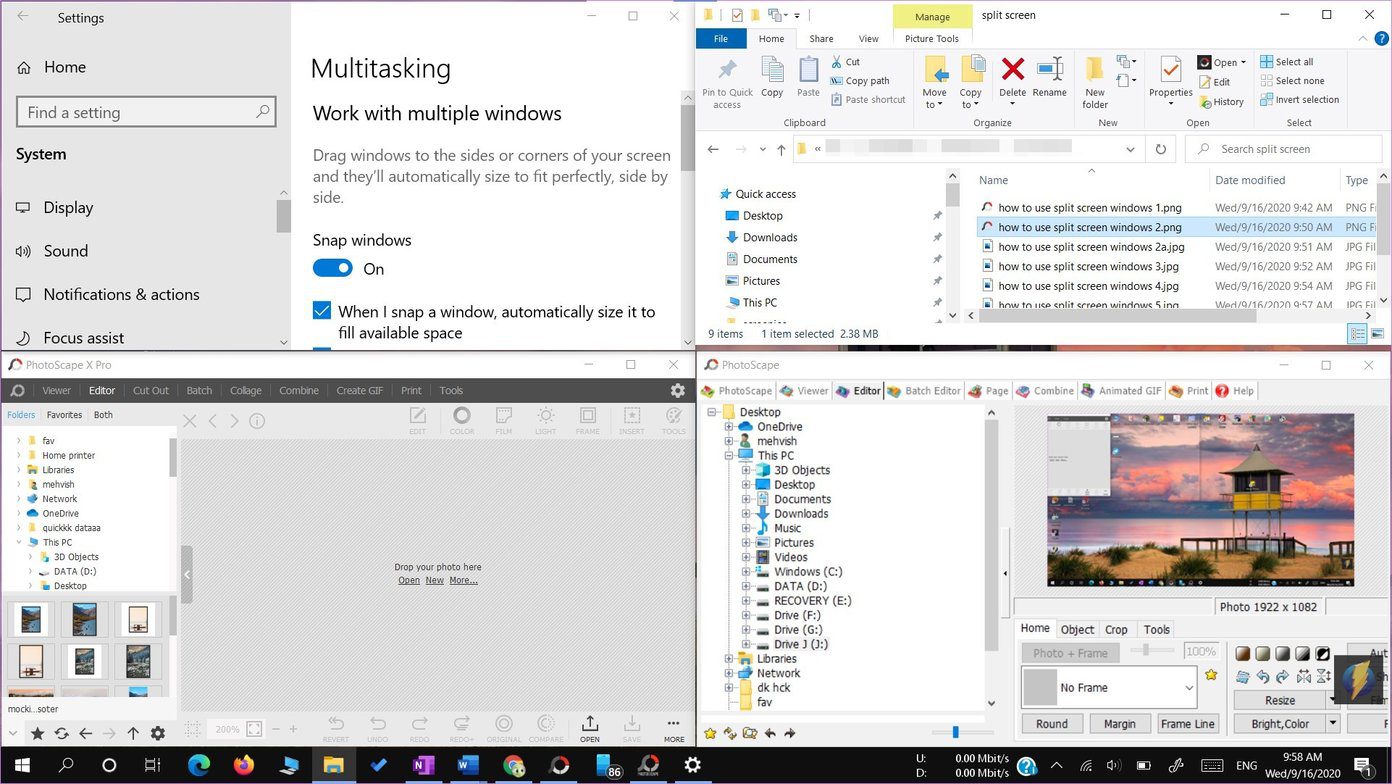
Your screen will be split into a quadrant, with each window taking each edge for four windows set up.
The cool thing about this feature is that unless and until you don’t maximize windows, your snapped windows will retain their position even if you minimize them, open other windows, or split more windows.
Note: You cannot snap two windows to top and bottom, i.e., horizontally. You can do it in a three-window setup or split them left to right, i.e. vertically.
How to Enable Split Screen
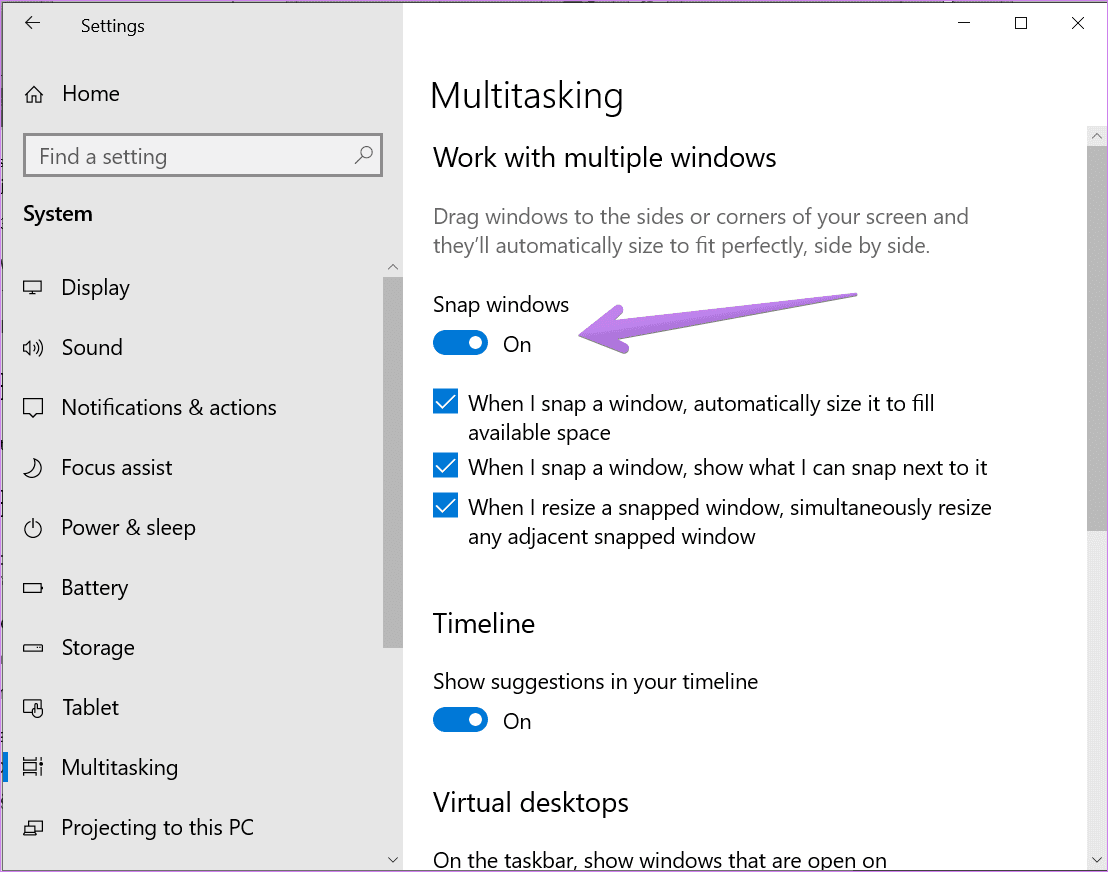
To use the split-screen functionality, you need to enable Multitasking in settings. For that, follow these steps:
Step 1: Open Settings on your PC from Start Menu or press Windows key + I keyboard shortcut. Go to System.
Step 2: Go to Multitasking from the left panel. Enable the toggle under Snap windows. Also, enable all other toggles available under Snap windows. You can turn them off depending on your needs once you get hold of the split-screen feature.
How to Use Split Screen in Windows 10
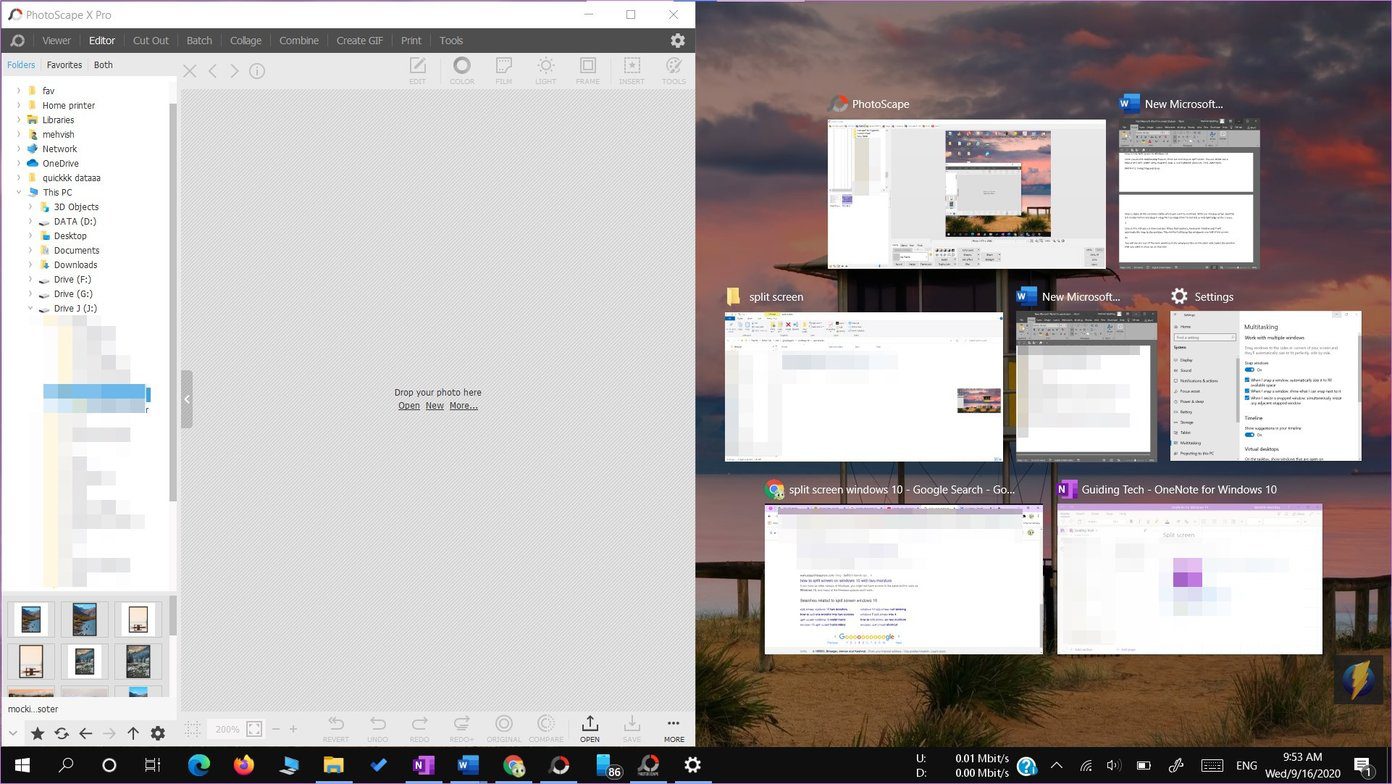
Once you enable the multitasking feature, there are two ways to split screen. You can either use a mouse and split screen using drag and drop or use keyboard shortcuts. Let’s check both.
Method 1: Using Drag and Drag
We will first cover the snapping of two windows followed by three and four windows.
How to Split Screen Into Two Windows
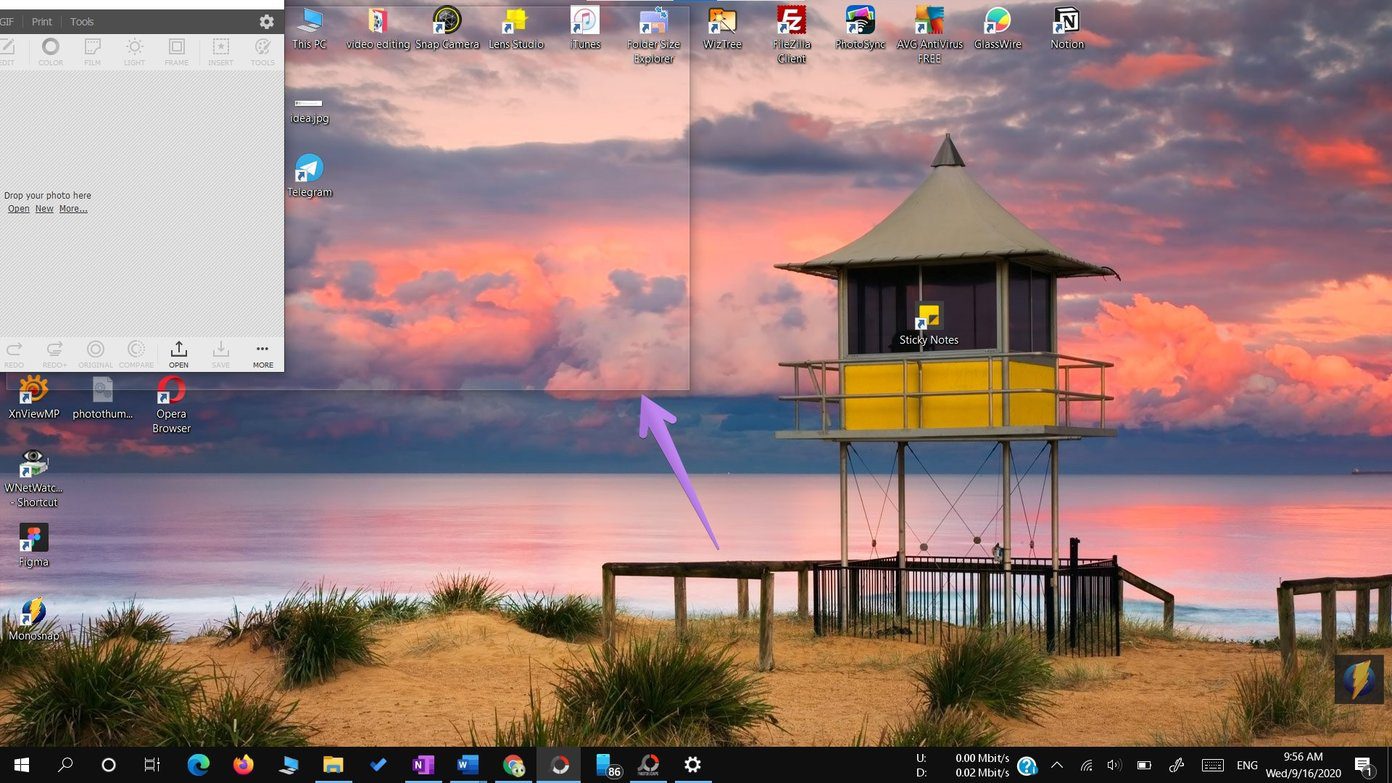
Step 1: Open all the windows within which you want to multitask. With one window active, hold the left mouse button and drag it using the top edge (title bar) either to the mid-left or mid-right edge of the screen.

Step 2: You will see a translucent area. When that appears, leave your window and it will automatically snap to the position. This method will keep the window in one half of the screen.
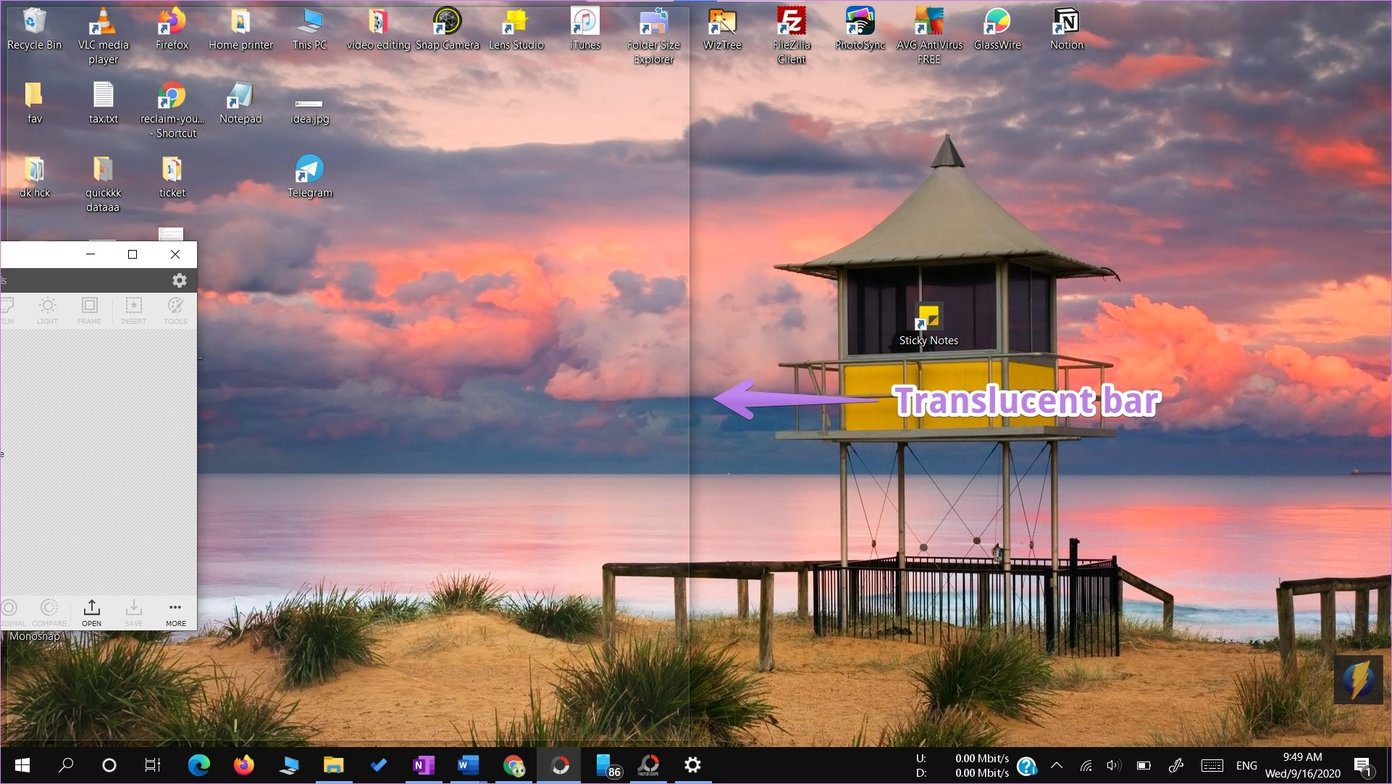
You will see the rest of the open windows in the empty portion on the other side. Select the window that you want to show up on that side.
How to Split Screen into Four Windows
The above method lets you snap windows into two portions. To split in three or four, you need to drag the windows to the right or left corners instead of the middle.
You will see the translucent area. Leave the window in the section where you want the window to appear. Repeat for other windows.
Method 2: Using Keyboard Shortcuts
Instead of dragging the windows, you can snap them using keyboard shortcuts as well. To snap a window to the left edge, click on the window once to make it active. Then press Windows key + left arrow. To snap to the right edge, use the Windows key + right arrow. That will immediately snap the window. Once you do so, you will be asked to select one of the open windows to snap on the other side. If you don’t get that option, use the same shortcut again. That will bring up the panel to select windows.
To snap four windows or snap a window to the corners such as top-left, top-right, bottom-left, bottom-right edge, you can again use the keyboard shortcuts. To snap to the top-left corner, make the desired window active by clicking on it once. Then press the Windows key + left arrow followed by the up button with the Windows key still pressed. If that doesn’t work, press the Windows key + left arrow shortcut twice. With the Windows key still pressed, press the up arrow. Similarly, repeat the shortcuts for other corners using combinations of right and down arrows.
Pro Tip: Switch between open windows using Task view in Windows 10. Check out other ways to use Task View .
How to Adjust Size of Windows
By default, each window will get equal screen space. But you can customize and adjust the dimensions according to your need. For that, hold the dividing line between any two windows and adjust the size.

How to Remove Split Screen
To unsnap the windows, maximize the windows ,and that will remove the snapping capability.

Alternatively, you can minimize all the windows by pressing the Desktop button, located at the bottom-right right corner. You can even use the Windows key + D shortcut to minimize the windows.
Multitasking Not Working
In case you are unable to split the windows, enable the multitasking feature in settings first, as shown above. If that doesn’t fix the issue, check other ways to fix Snap Assist not working in Windows 10 .
Next up: Don’t like the Photos app offered by Microsoft? Check 5 cool alternatives to the Windows 10 Photos app from the next link.
Was this helpful?
Have you been told to take a screenshot using the Print Screen key on your Windows 10 computer? And now you are left wondering where the Print Screen button is? Even if you found the button and pressed it, nothing would have happened. So you are more confused now. Don’t worry. We are here to help. By the end of the post, you will be a champ in using the Print Screen button to take screenshots on Windows 10.

Questions like where is the Print Screen button, how to enable Print screen, and how to use the Print screen button are answered in this post. We have also covered how to take a screenshot in Windows 10 without the Print screen button.
Let’s get started on discovering the superpowers of the Print Screen button in Windows 10.
Where Is the Print Screen Button
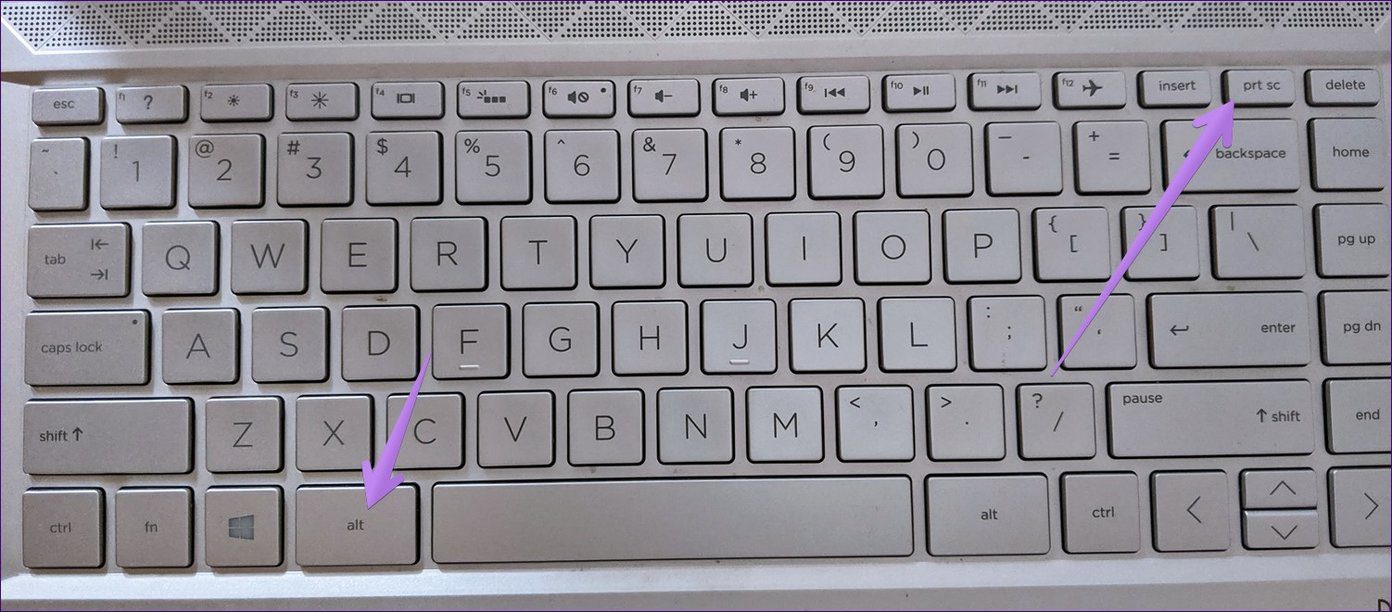
The Print Screen button is usually present at the upper right side of your keyboard. You will see one of the text labels on the key:
- Prt sc
- PrtSc
- PrtScn
- PrntScrn
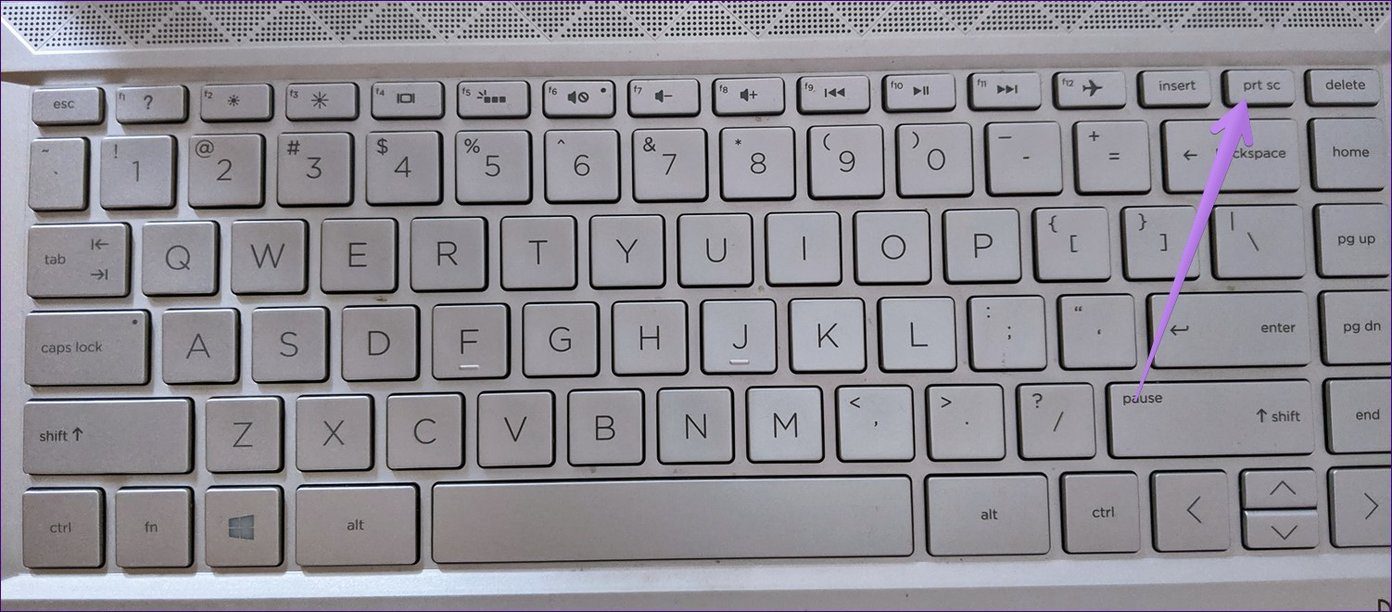
If something else is mentioned along with the print screen button, then you will have to trigger it with the function key (fn) on your keyboard. That is, hold the fn key and the Print screen buttons together to take a screenshot.

Tip : If your keyboard doesn’t have the Print Screen button , use the Function (fn) + Windows key + Spacebar to take a screenshot. In case the Print screen isn’t working , check out various ways to fix it.
How to Use Print Screen Button to Take Screenshot in Windows
There are several ways to take a screenshot using the Print screen button on Windows 10. Let’s check them out.
Method 1: Capture Entire Screen With Print Screen
This is the simplest method to take a screenshot on Windows 10. Pressing the Print Screen key on your keyboard copies the entire (active) screen to your clipboard . Even though a screenshot is technically captured, it’s not saved anywhere on your computer.
The screenshot resides in your computer’s clipboard for a temporary period till you copy something else. You need to paste the copied content (the screenshot) in a supported app such as MS Paint, Paint 3D, etc. Use Ctrl+V keyboard shortcut to paste the image. Once pasted, save the image using the app’s save button. It’s not necessary to paste the screenshot in photo-editing apps, you can even paste it in Microsoft Word or Google Docs .
Note: Use fn + Print screen combination if nothing is copied to the clipboard.
Typically, when you take a screenshot on your mobile phone, the screen will dim for a second, which indicates that a screenshot is taken. However, nothing will happen to the screen using this method. The screen won’t dim when you simply press the Print Screen button. So don’t get scared, just open any supported app and paste the copied screenshot.
Tip: If you use OneDrive, your captured screenshots will automatically be saved in your OneDrive folder. In case you are notified that screenshots are saved in OneDrive, find out how to turn off that notification and how to disable storing of screenshots in OneDrive .
Method 2: Capture and Save Entire Screen Using Print Screen
The above method doesn’t save the screenshot directly to your computer. To save screenshots on your PC without pasting them first, press the Windows key + Print screen button simultaneously. The screen will dim for a second, indicating that a screenshot has been taken. In this method, the entire screen is captured.

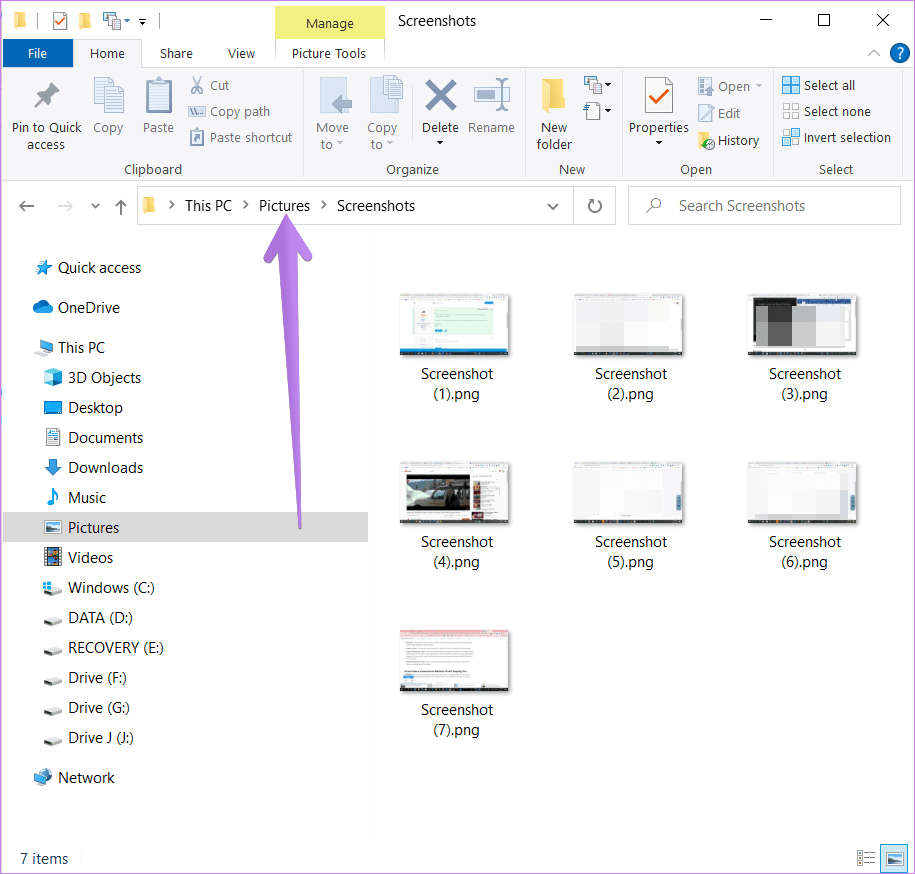
You will find the captured screenshots in the Pictures > Screenshots folder. If you don’t find that, follow this path C:\Users\username\Pictures\Screenshots.
Method 3: Capture Active Window With Print Screen
Instead of capturing the entire screen, this method will help you take a screenshot of an active window. Let’s say you want to take a screenshot of the minimized Word screen. You can do it by using the Alt + Print screen keyboard shortcut. Press both buttons simultaneously to take a screenshot of your active window.
Similar to method 1, the screenshot will not be saved directly. You will need to paste it into a supported app such as MS Paint and then save it.
Method 4: Assign the Snipping Tool to Print Screen Key
If the above methods do not meet your requirements, you can assign the Windows 10 Snipping tool to the Print screen key. When you do so, the Snipping tool will get activated when you press the Print screen key on your keyboard.
With the Snipping tool, you can take custom screenshots. You can choose the area whose screenshot you want to take, capture the selected window, and perform other advanced tricks. The screenshots will open in the Snipping Tool where you can annotate and draw on them. Finally, save the screenshot. Check out various tips and tricks related to the Windows 10 Snipping Tool .
To assign the Snipping tool to the Print screen key, follow these steps:
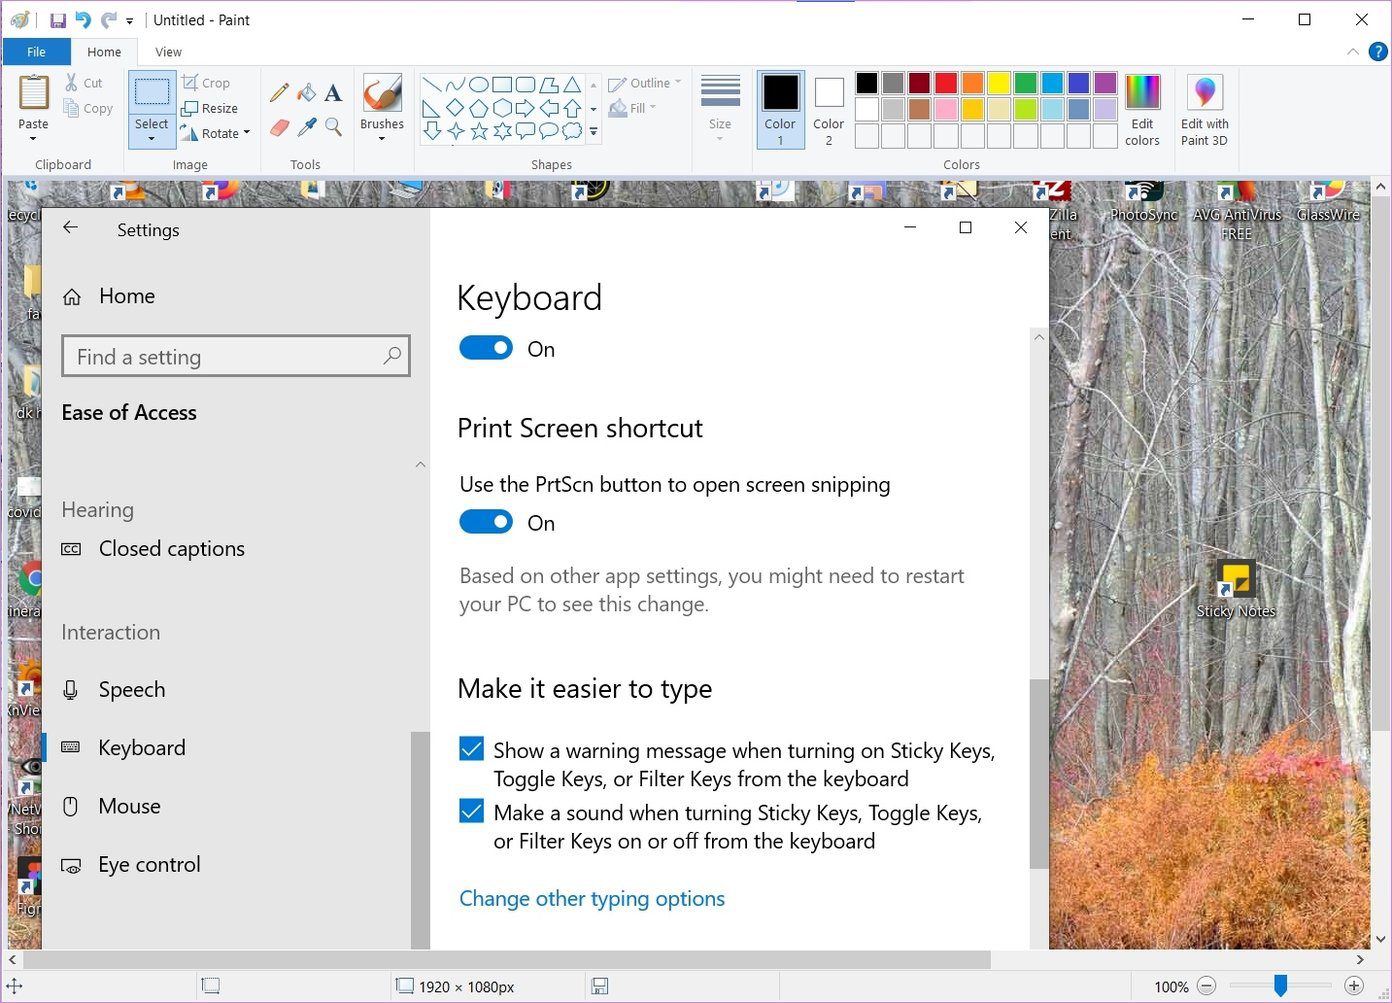
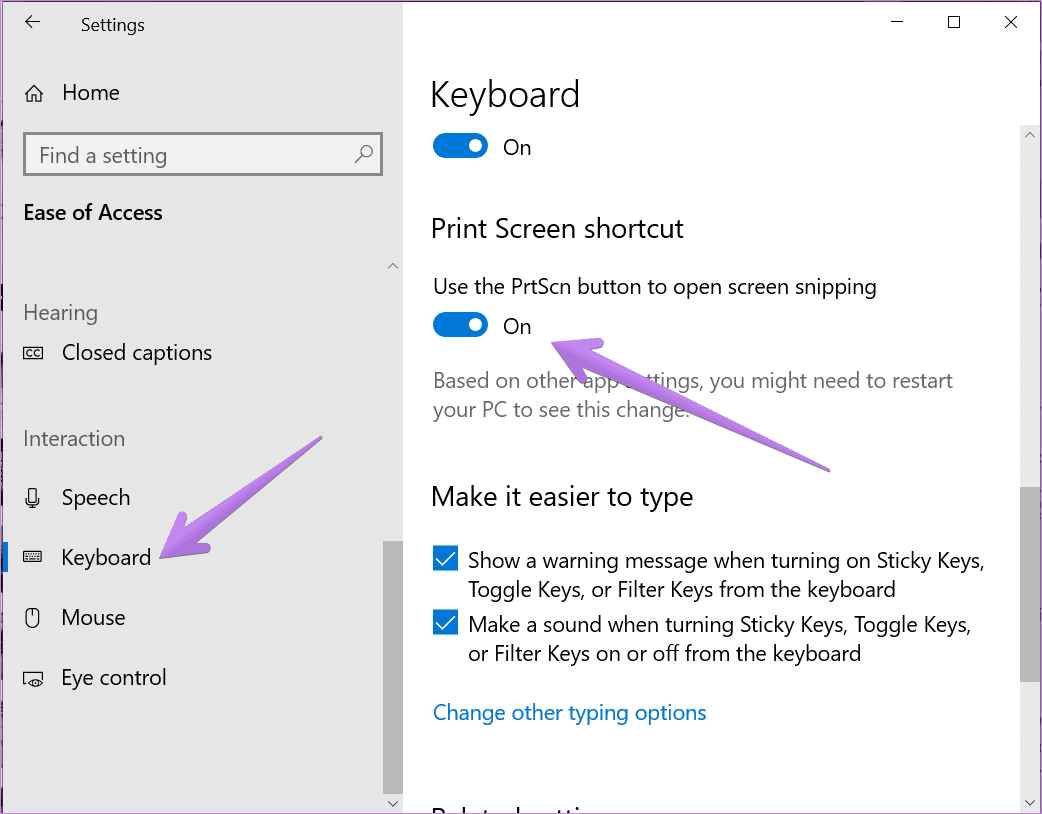
Step 1: Open Settings on your Windows 10 PC from Start Menu. Alternatively, use Windows + I keyboard shortcut to open settings. Go to Ease of Access.
Step 2: From the left sidebar in Ease of access, scroll down and click on Keyboard. On the right side, you will find Keyboard settings. Scroll down and enable the toggle for Print Screen shortcut.
Bonus: How to Take Screenshot Without Print Screen on Windows 10
If you don’t want to remap the Print screen key to the Snipping tool or use Print screen to take a screenshot, you can still open the Snipping tool using the Windows key + Shift + S keyboard shortcut. Alternatively, open the Snipping tool from the Start Menu. You can also use the Snip and Sketch tool of Windows to take a screenshot without the Print screen button. Find out what’s the difference between the Snipping Tool and Snip and Sketch on Windows 10.
The Best Method
Methods 2 and 4 are convenient for taking and saving screenshots both. I mostly settle for Method 4 on my computer where I use the Snipping tool with the help of the Print screen button. It lets me take a screenshot with the ability to draw on them.
Next up: If for some reason, you are unable to take screenshots on your Windows 10 PC, check out 4 ways to fix it from the next link.
