Windows 10’s Microsoft Store contains a decent library of apps, some of which — such as iTunes — work better than traditional desktop programs. But the mere act of downloading these apps to your PC can prove to be quite challenging. After you click the Get or Install buttons in the Microsoft Store, nothing happens. That must be frustrating. So we’ll try to help you fix the issue when you click on Get or Install button in Microsoft Store, and that leads to no activity.
I faced the issue with unresponsive Get or Install button recently. But thankfully, it was among the easier problems associated with the Microsoft Store that I could resolve.
Hence, the following list of troubleshooting tips should put you well on your way to downloading your favorite apps off the Microsoft Store in no time. Let’s start with the ones that worked.
Tip: Before starting, it’s a great idea to restart your PC. This simple action can help fix various anomalies of Windows. Get that out of the way first.
1. Reset Microsoft Store
What helped me resolve the issue with non-responsive Get/Install buttons almost immediately was a complete reset of the Microsoft Store.
Resetting the Microsoft Store reverts it to its default settings, thereby allowing the app to run again without improper configurations messing things up.
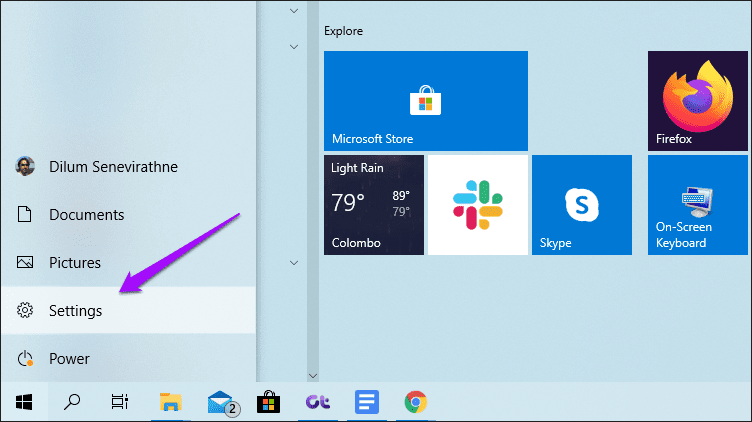
Step 1: Open the Start menu, point to the cog-shaped Settings icon, and then click Settings.
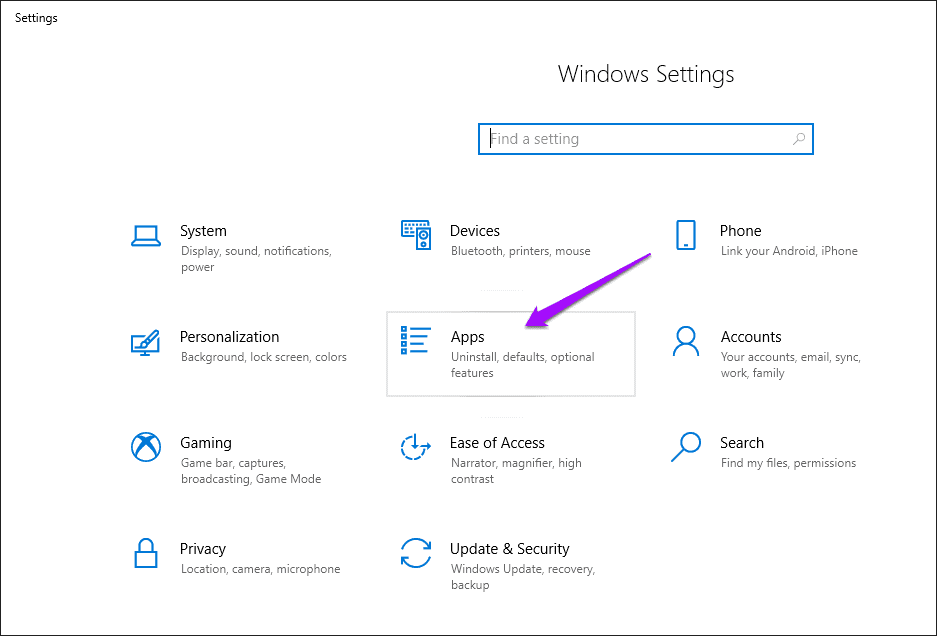
Step 2: Click Apps.
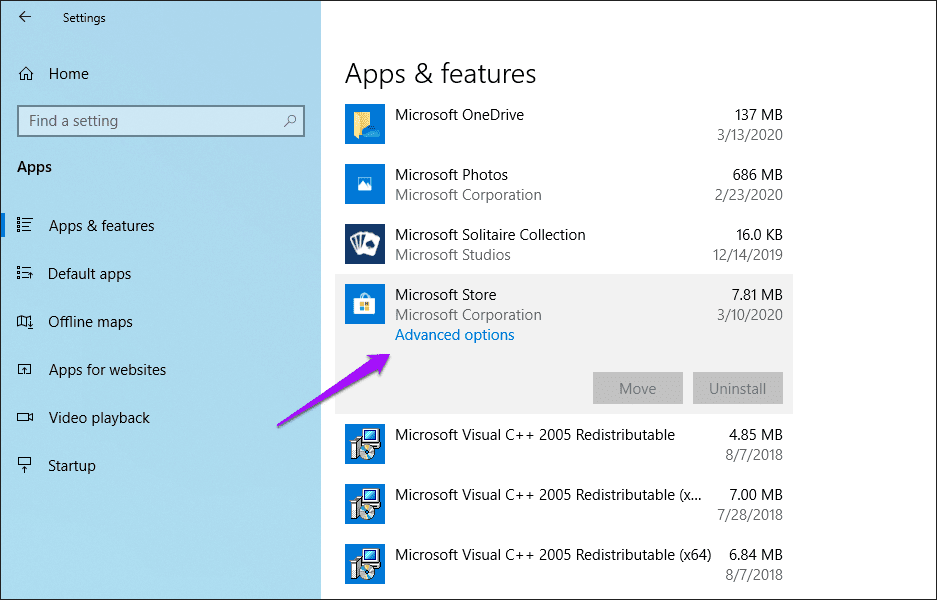
Step 3: Select Microsoft Store from the list of apps, and then click Advanced Options.
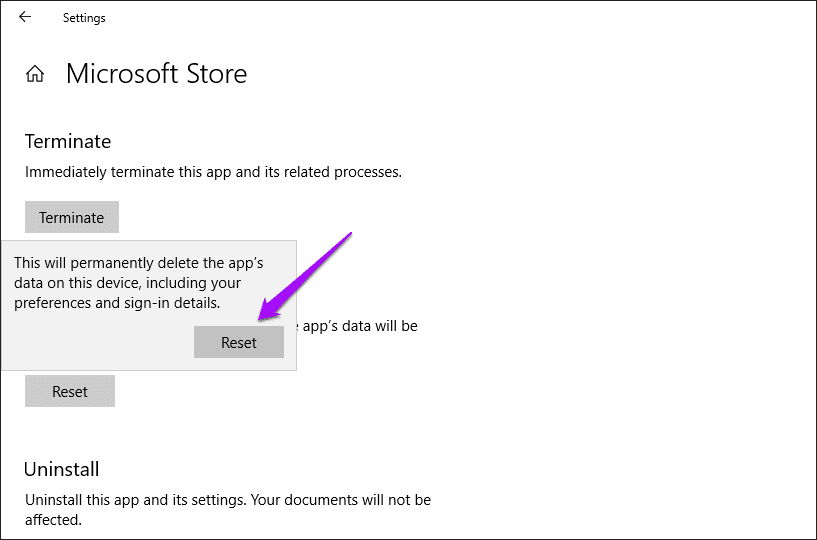
Step 4: Scroll down, and then click Reset.

Step 5: Click Reset Again on the confirmation box. Wait for the reset procedure to finish, and then exit the Settings app.
Step 6: Launch the Microsoft Store by searching for it (via the Start menu or Search), and then click Open.
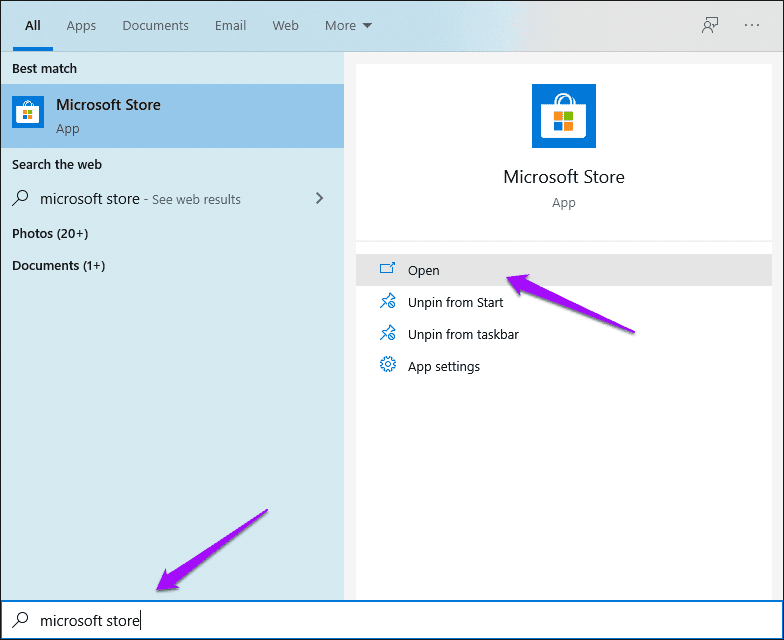
Note: The reset procedure removes the Microsoft Store taskbar icon. After searching, use the Pin to Taskbar option if you want to get it back onto the taskbar.
Once the Microsoft Store finishes launching, attempt to install an app. It should most likely oblige. If that didn’t help, proceed on to the next troubleshooting tip.
2. Clear Microsoft Store Cache
Windows 10 comes with a built-in Command Prompt executable that deletes the Microsoft Store cache. If the unresponsive Get/Install buttons are the result of redundant or obsolete cached data, then running this executable should likely resolve the issue.
Step 1: Search for wsreset.exe (via the Start menu or Search), and then click Open.
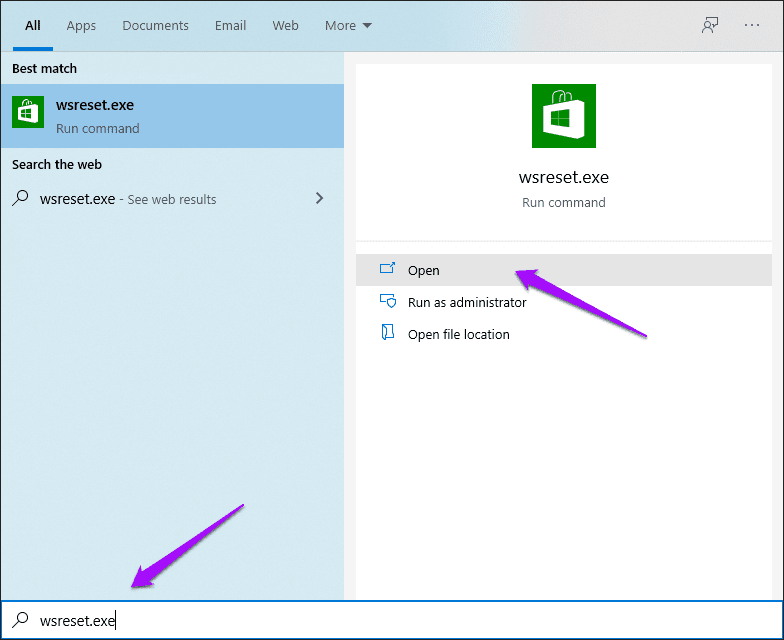
Step 2: Wait for a few seconds while the Command Prompt clears the Microsoft Store cache. You don’t have to do anything.

Once the cache is cleared, the Microsoft Store should launch automatically. Check if the Get or Install button is working properly. If they aren’t responsive, read on to figure out what you must do next.
3. Sign Out/Sign In to Microsoft Store
Signing out of the Microsoft Store, and then signing back into it can help fix adamant Get or Install button that refuses to work.
Step 1: Open the Microsoft Store, and then click your profile portrait to the upper-right corner of the app window. On the menu that shows up, click your Microsoft Account.

Step 2: Click Sign Out underneath the Microsoft Store account that you are signed in with. After signing out, exit and relaunch the Microsoft Store.

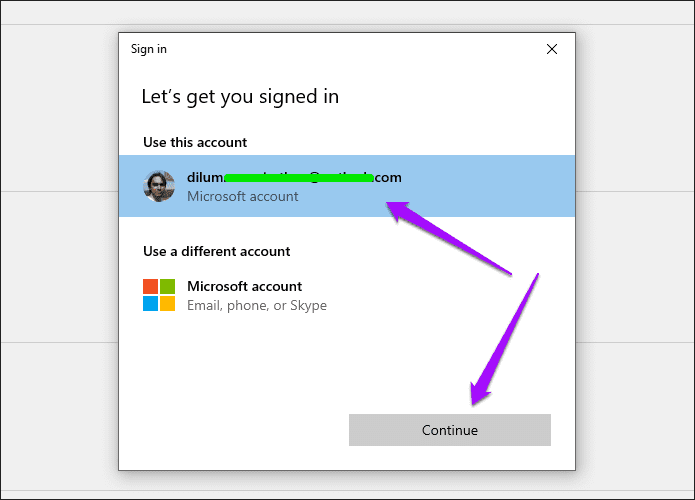
Step 3: Click the profile icon (which should appear vacant), and then click Sign In.

Step 4: Select your Microsoft Account, and then click Continue to sign back in. You may have to go through a certain form of authentication (such as inserting the login PIN code) to complete the sign in procedure.
Once you’ve finished signing back in, try installing an app. The issue should most likely be resolved.
4. Run Microsoft Store Troubleshooter
Windows 10 features a built-in troubleshooter that can automatically find and fix issues related to the Microsoft Store. If the tips above failed to work, then it’s time to put the troubleshooter into action.
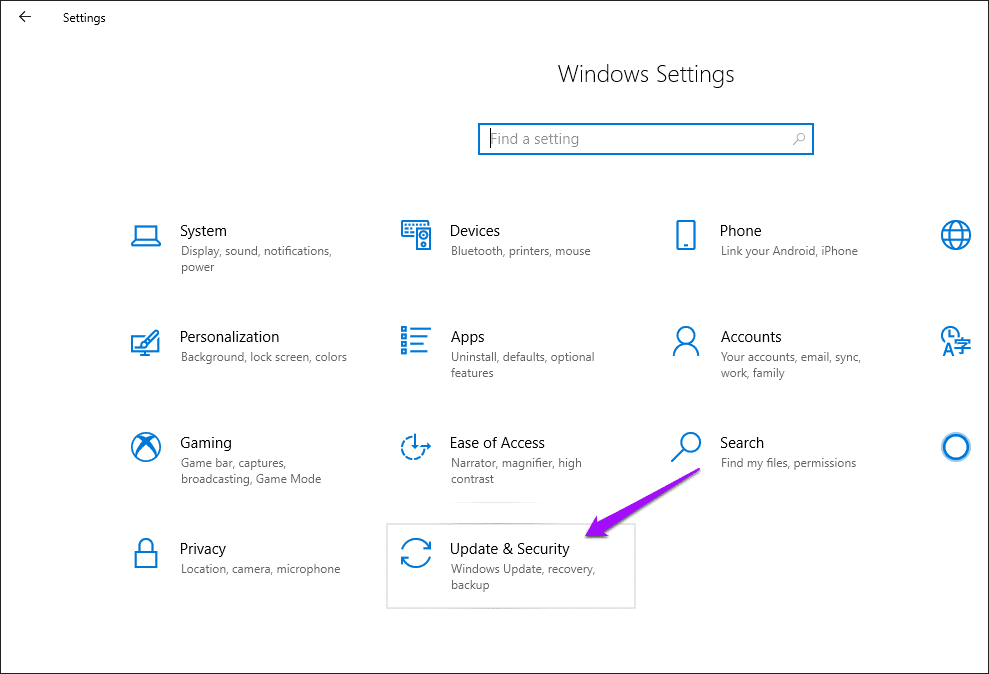
Step 1: Open the Settings app (click Settings in Start menu), and then click Update & Security.
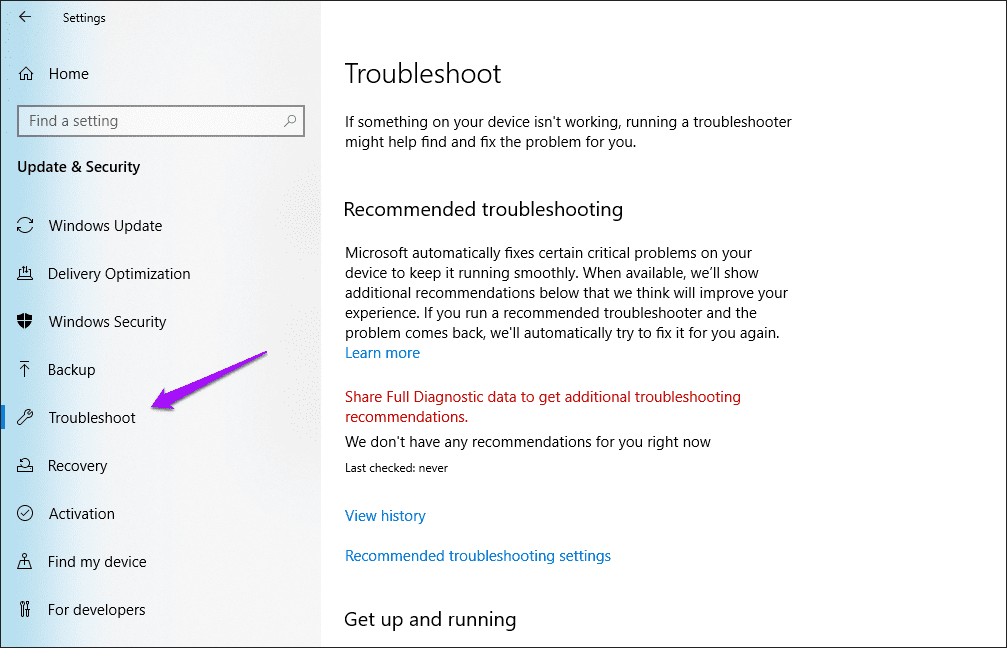
Step 2: Click the side-tab labeled Troubleshoot.
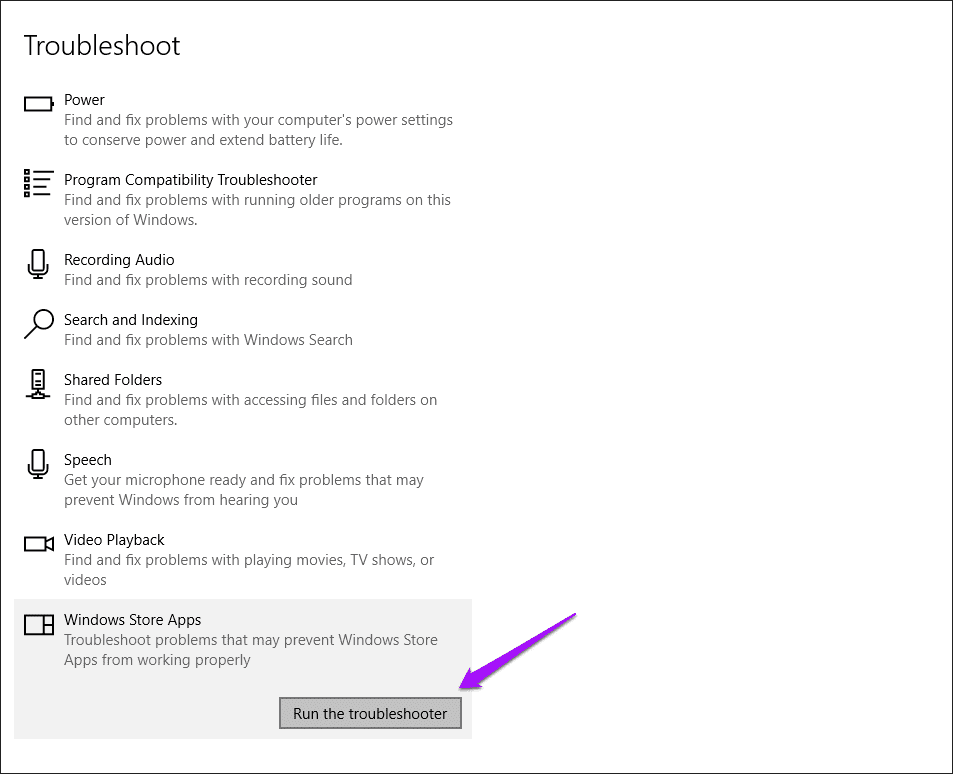
Step 3: Scroll down the list of troubleshooting options, click Windows Store Apps, and then click Run the Troubleshooter. It’s then a simple matter of following the onscreen instructions to patch up the Microsoft Store.
If any issues were detected and fixed by the troubleshooter, the Get or Install button should likely work properly.
5. Re-Register Microsoft Store
Re-registering the Microsoft Store with Windows 10 is a viable fix that can patch up adamant issues associated with the app. The procedure can be accomplished quickly by running a certain command via the Windows PowerShell console .
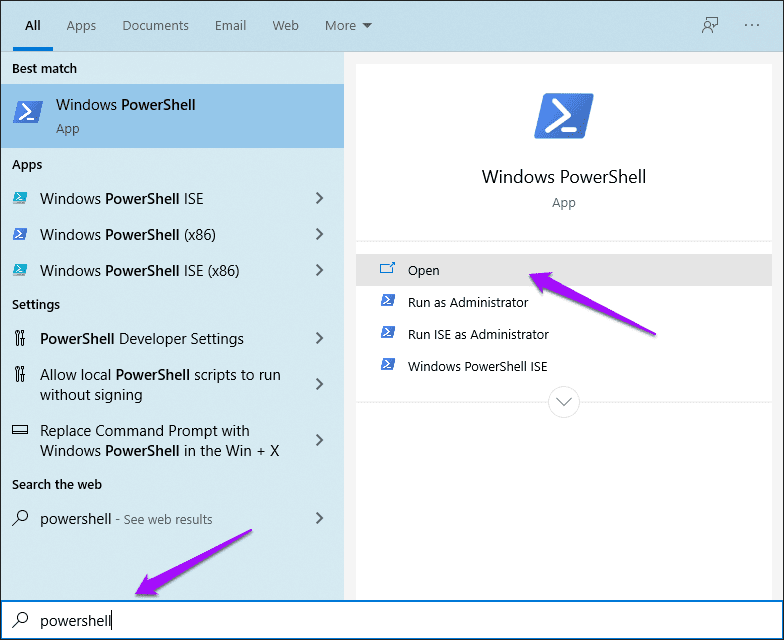
Step 1: Search for Windows PowerShell (via the Start menu or Search), and then click Open.
Step 2: Copy and paste the following command into Windows PowerShell:
Get-AppXPackage *Microsoft.WindowsStore* | Foreach {Add-AppxPackage -DisableDevelopmentMode -Register “$($_.InstallLocation)\AppXManifest.xml”}
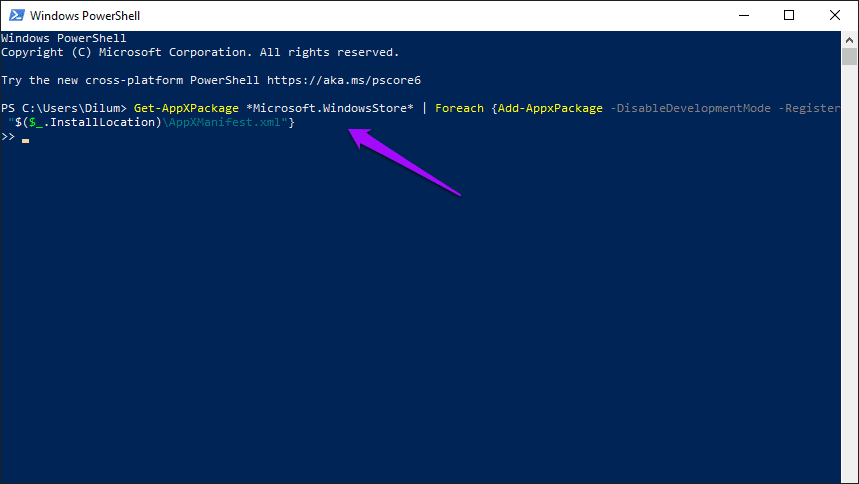
Step 3: Press Enter to execute the command.

Open the Microsoft Store afterward, and then try installing an app to see if the issue is now resolved.
Start Downloading
Are the Get or Install buttons in the Microsoft Store responding once again? They most likely should. If the issue persists, you may want to update Windows 10 . Head over to Start > Settings > Update & Security > Windows Update to check for and install the latest updates. If a known technical issue was preventing the Microsoft Store from functioning properly, then performing an update will patch things up.
Next up: Now that the Microsoft Store is back to normal, here are six awesome tips to go through right away.
Was this helpful?
- Set the connected printer as default from Windows Settings > Bluetooth & devices > Printers & scanners > Set as default, and retry printing your file.
- Rollback the recently installed Windows Update from Settings > Windows Update > Update history > Uninstall updates.
Basic Fixes
- Reconnect printer : If you’re using a wired printer, its loose USB connection to your PC may result in ‘Printer not activated (Error Code 30)’. Replug the printer and replace its cable if it is worn out.
- Update the USB drivers : Obsolete USB drivers can create printer connectivity issues. Head to the Device Manager app, expand ‘Universal Serial Bus controllers’, right-click the buggy USB port, and select Update driver.
- Use the HP Smart app to connect the printer : If your Windows 11 PC doesn’t detect your HP printer , install the HP Smart app from the Microsoft Store, and use it to configure printer settings.
- Update Windows : Press the Windows + I shortcut to open Settings, select Windows Update from the left sidebar, and install available system updates.
Fix 1: Set the Connected Printer as Default
If your preferred printer isn’t set as default, you may run into the ‘Printer not activated, error code-30’ issue on Windows. Ensure your printer has adequate paper and ink and use the following steps to set it as a default printer:
Step 1: Open Windows Settings using the Windows + I shortcut, select Bluetooth & devices from the left sidebar, and click Printers & scanners .

Step 2: Select your preferred office or home printer.

Step 3: Ensure the Printer status isn’t Offline and click Set as default to assign it as a default printer for all printing operations.
Tip: If the Printer status is labeled ‘Offline’, check its power source and try reconnecting it to your PC.

Fix 2: Reinstall Printer Drivers
Corrupt printer drivers can cause unusual printing errors. To fix this, first remove the printer from Windows Settings > Bluetooth & devices > Printers & scanners, and re-plug the printer. Then, reinstall the printer drivers using the Device Manager app to restore normalcy.
Step 1: Press the Windows + X shortcut to open the Power User Menu, and select Device Manager .

Step 2: Expand Software devices , right-click your printer, and select Uninstall device . Restart your PC and let Windows 11 automatically install compatible printer drivers.

Fix 3: Run the Printer Troubleshooter
Do you still face the ‘Printer not activated (Error Code 30)’ message while printing a PDF on Windows 11? Running the in-built printer troubleshooter should fix it in no time.
Step 1: Select Printers & scanners under Windows settings (check the above steps), and click your connected printer.

Step 2: Select Run the troubleshooter and wait a few seconds to let it resolve the issue.

Fix 4: Tweak Permission Settings on a Program
If you face the ‘Printer not activated, error code-30’ in a specific app, give it full control over your PC to print files and documents seamlessly.
Step 1: Right-click the app icon and select Show more options .

Step 2: Select Properties from the right-click context menu to open it.

Step 3: Open the Security tab and click Edit .

Step 4: Enable the Allow checkmark beside Full control and click Apply followed by OK to save changes.

Fix 5: Rollback the Recent Windows Update
Lastly, a buggy Windows Update can malfunction your connected printer showing the ‘Printer not activated (Error Code 30)’ message while initiating a new print. To fix it, rollback the recent Windows Update using these easy steps:
Step 1: Press the Windows key, search Uninstall updates , and click it to open the system settings.
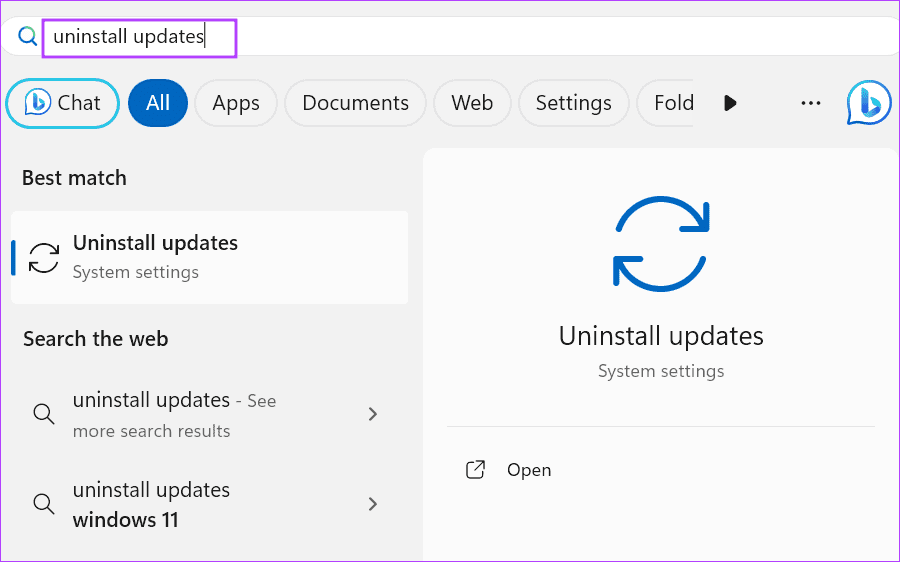
Step 2: Locate the recently installed Windows Update using the ‘Installed on’ timestamp, and click Uninstall to remove it. Select Uninstall when prompted to confirm the action.

