- One of the core reasons the switch user option is missing is due to a disabled user account.
- Quickly enable the account using Windows Registry or Windows PowerShell.
- Even Windows updates can break existing features, such as Switch User.
Fix 1: Enable Inactive Accounts
If the other user accounts on your system are disabled, they won’t appear on the login screen. To enable it, follow the below steps.
Step 1: Launch PowerShell as an administrator option.
Step 2: Type the following command and press Enter :
Get-localuser
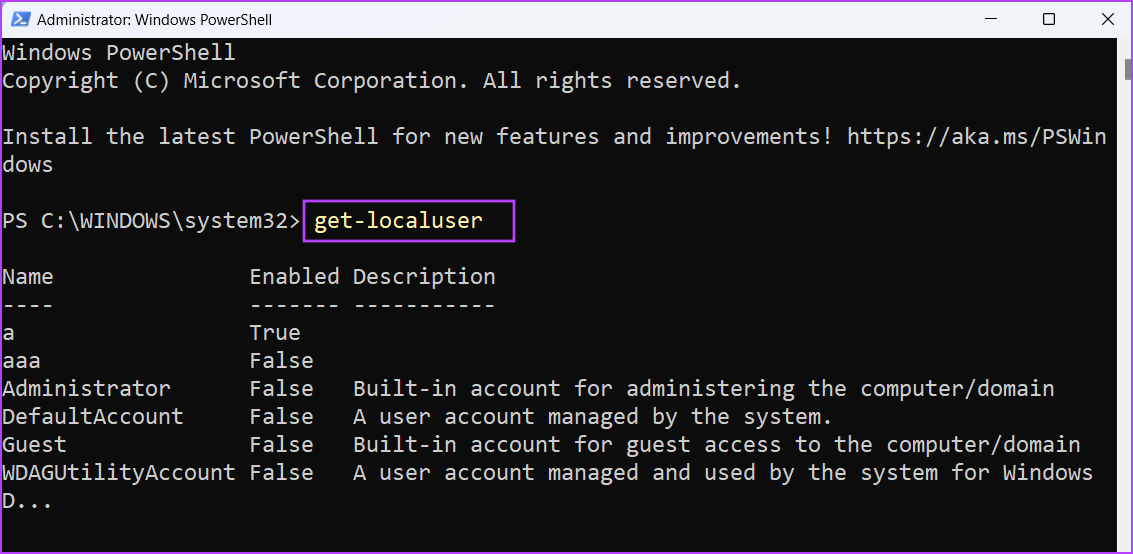
You will see a list of all user accounts on your system, along with their current state (enabled or disabled).
Step 3 : To enable an inactive user account, type the below command:
Net user username /active:yes
Replace the username in the above code with the name of the user account that is inactive on your PC. In our case, the command becomes:
Net user aaa /active:yes
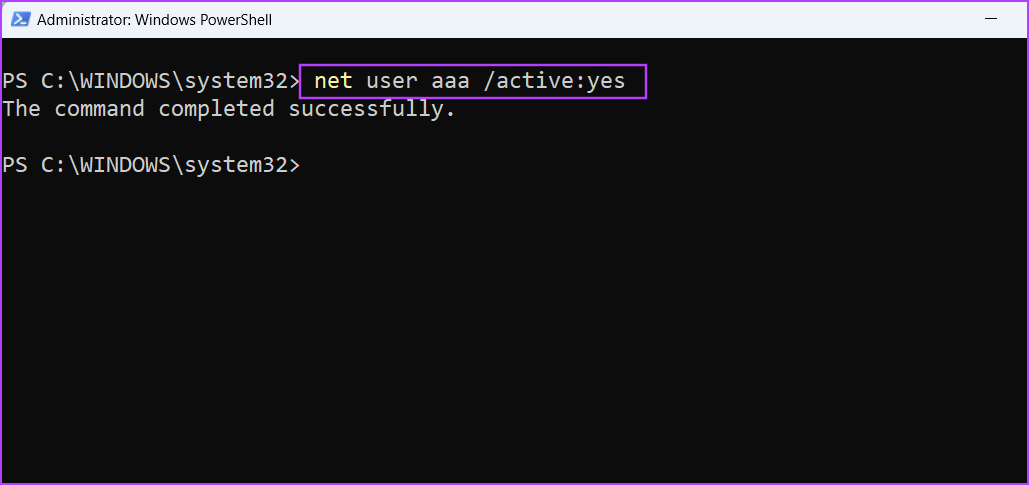
If there are multiple inactive accounts, use the above command to enable all other inactive accounts. Lastly, restart your PC to apply the changes.
Fix 2: Modify Windows Registry
Before starting with the below steps, create a registry backup and save it on a USB drive.
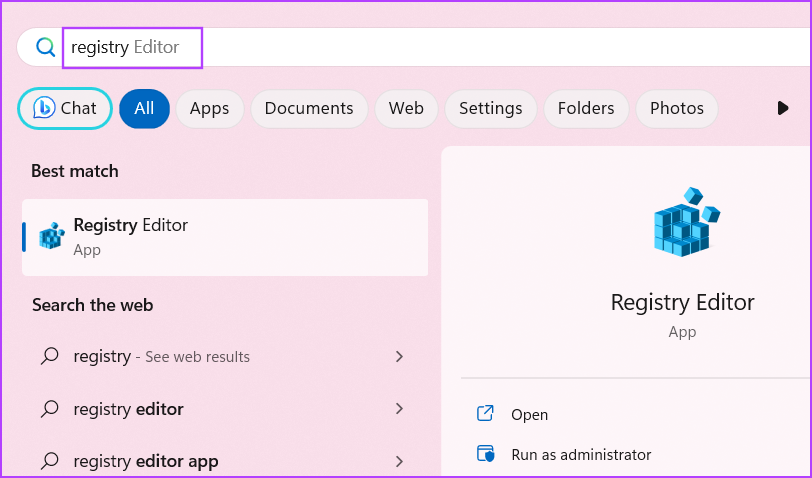
Step 1: Press the Windows key , type registry in the search bar, and press Enter .
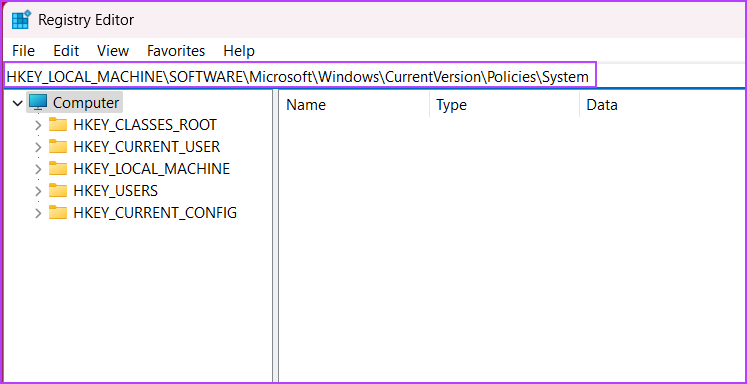
Step 2: Go to the top address bar, paste the following path, and press Enter :
HKEY_LOCAL_MACHINE\SOFTWARE\Microsoft\Windows\CurrentVersion\Policies\System
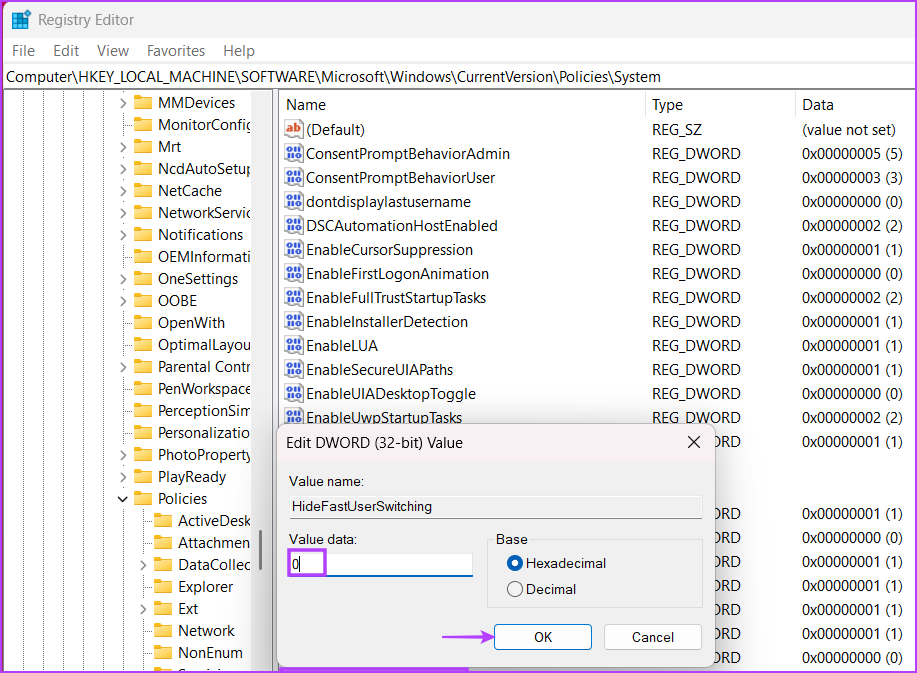
Step 3: Locate the HideFastUserSwitching registry value and move to Step 5.
If it doesn’t exist, right-click on the page and click on New . Then, click on DWORD (32-bit) .

Step 4: Name the newly created DWORD (32-bit) value HideFastUserSwitching and double-click on it.
Step 5: Set the Value data to 0 and click on OK .
Finally, close the Registry Editor and restart your system to apply the changes.
Also Read : How to safely clean Registry on Windows 10 and 11
Fix 3: Enable User Accounts Using Local Users and Groups Option
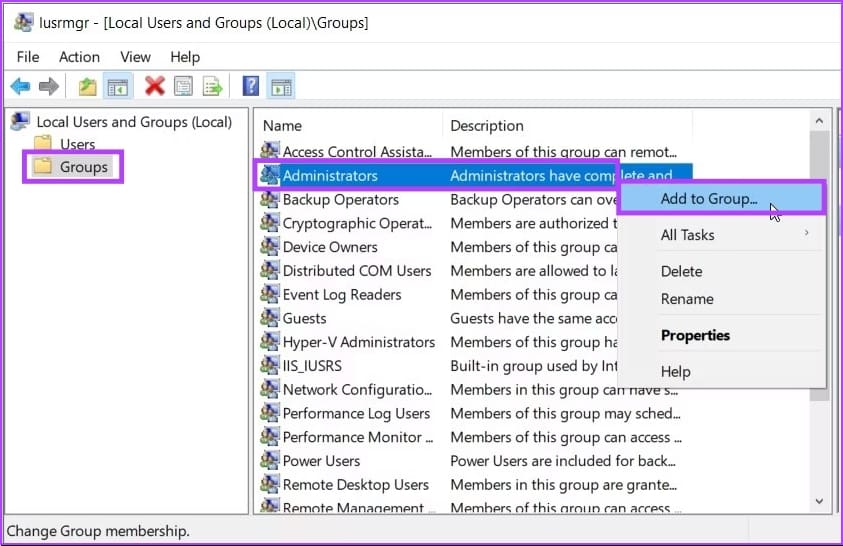
Step 1 : Launch the Run command box and type lusrmgr.msc to open the Local Users and Groups tool.
Step 2 : Go to the Groups folder.
Step 3 : Right-click on the Administrators and select the Add to Group option.
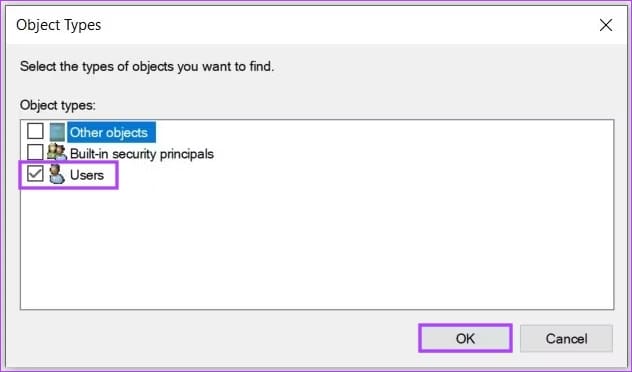
Step 4 : Click the Add button and press the Object Types button on the Select Users screen.
Step 5 : Check the box next to the Users box and press OK .
You will be taken back to the Select Users screen.
Step 6 : Go to Advanced and click the Find Now button.
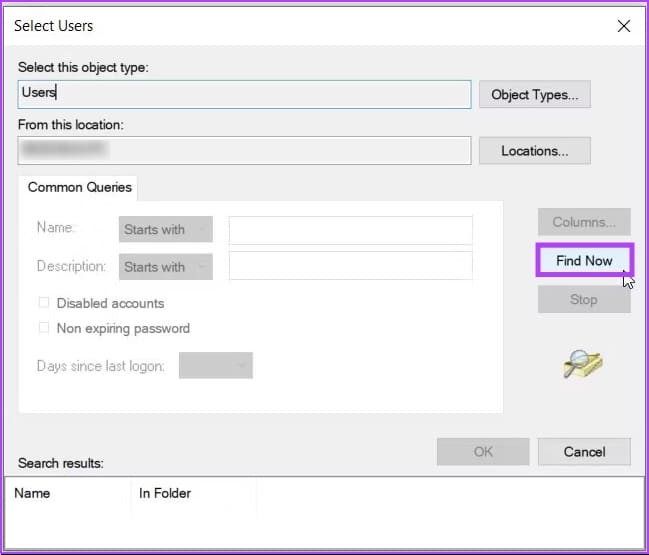
From the search results, select the username that isn’t appearing on the login screen and click OK . Once done, restart your computer to save the changes.
If you want to enable multiple accounts, you must repeat the above steps.
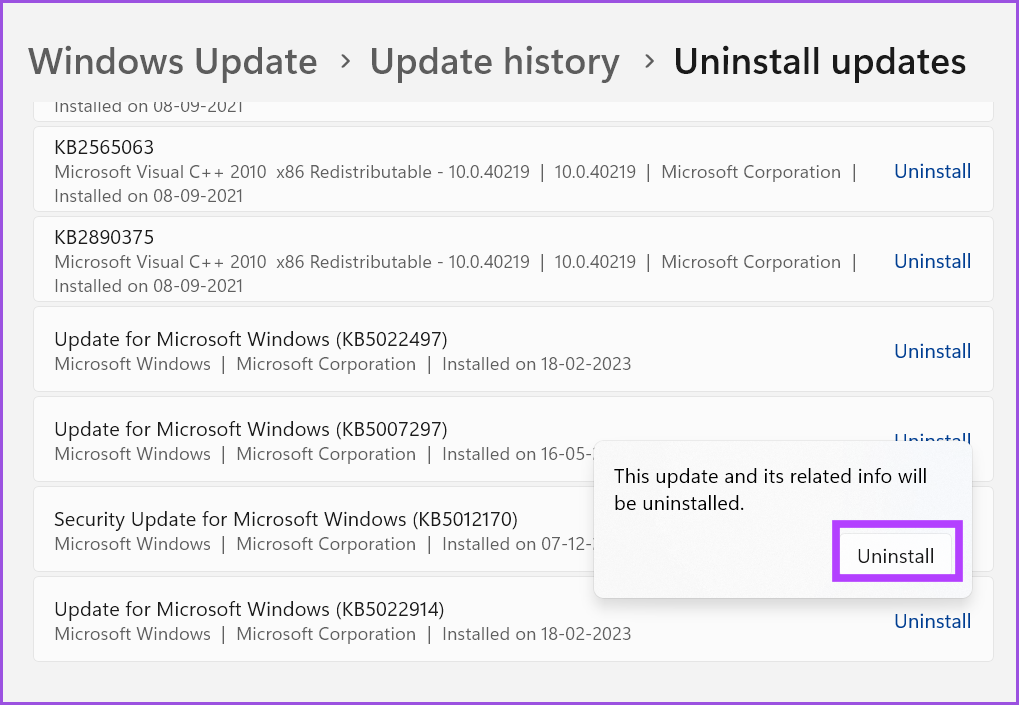
Fix 4: Remove a Recent Windows Update
Step 1: Launch the Settings app and go to Windows Update .
Step 2: Click on Update history .
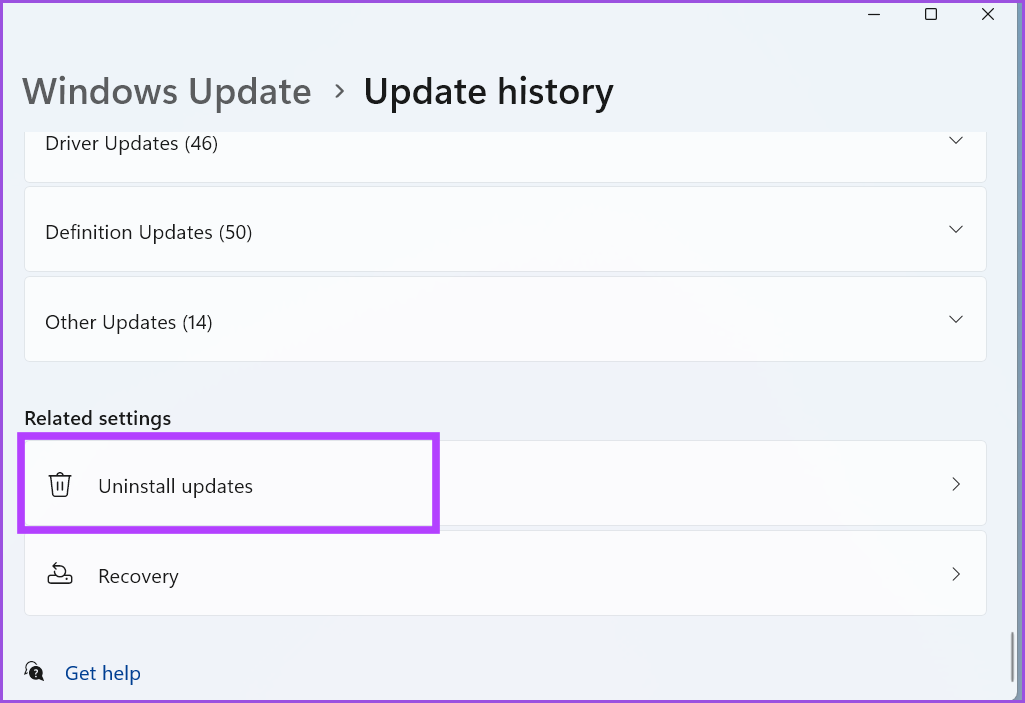
Step 3: Scroll down to the Related settings section and click on Uninstall updates .
Step 4: Find the most recently installed update and click on Uninstall .
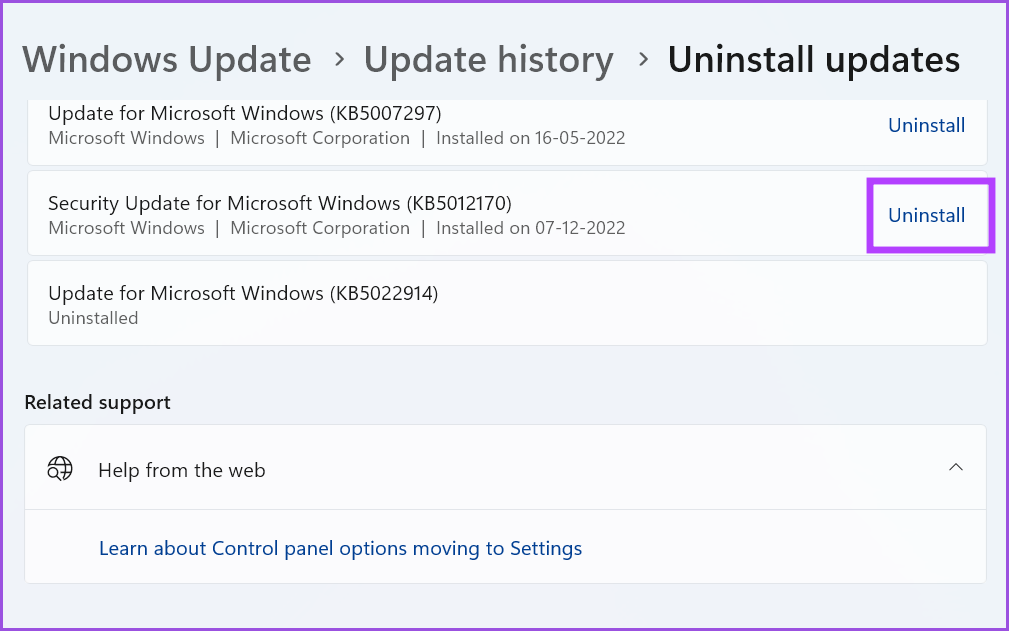
Step 5: Windows will reconfirm your decision to remove the update. Click on Uninstall .