Picture this – you’ve just launched the Netflix app on your Windows 10 computer to watch a new episode of your favorite show. In a surprising twist of events, you’re faced with a black screen with an error message that reads “Sorry, there was a problem communicating with Netflix” and a T1 error code. What does this error mean? How can you get it off your screen? Of course, you’d want to know the answers, and we shall help you fix Netflix’s T1 error in this post.

There are several Netflix error codes , each one has a meaning or reason assigned to it, causative factor(s), and solution(s). As for the T1 error, Netflix says, “Hey! There’s a network connectivity problem somewhere. Fix it or you won’t be able to use Netflix.”
Although the problem is majorly network-related, there are other device and app-specific bottlenecks that trigger this error.
If your computer cannot establish a connection with Netflix’s server via the Windows app, try accessing the service on a browser. If Netflix doesn’t work on the browser, the problem could be from Netflix’s end. Perhaps the Netflix server is offline ( check Netflix’s server status on DownDetector ). But if Netflix works on the browser, then there could be a problem with the app. Update Netflix from the Microsoft Store and try again.
Let’s have a look at other possible solutions to the Netflix T1 error.
1. Troubleshoot Internet Connection
Disable VPN and Proxy
If other apps but Netflix can access the internet on your PC, disable any VPN or Proxy connection and try again.
Netflix is strongly against using virtual private networks (VPNs), proxies, or other network blockers to bypass content geo-restriction . And it has upped its technology to detect when users employ such tools on the platform. So if Netflix finds out that you’re using a VPN or other network modification tools that it prohibits , it blocks access to its contents and servers. Hence, the T1 error on your screen.
Go to Settings > Network & Internet > VPN or Settings > Network & Internet > Proxy to disable any manual or automatic VPN and Proxy setup on your computer, respectively. You could also disable proxies and VPN from their dedicated apps.
Check Internet Source
You could also encounter the T1 error on the Netflix app if your internet connection is poor. For a start, power-cycle your router or boost its Wi-Fi signal . Resetting your router could also help. If the connection remains slow or unavailable, check with your internet provider that you have an active internet plan.
Troubleshoot Windows Network Settings
If you’ve tried everything mentioned above, but the error persists, performing a network reset on your Windows computer could help. Doing that will delete your PC’s network configurations (Wi-Fi, Ethernet, Bluetooth, VPN, etc.) and restore them to factory default.
Before you reset your PC’s network settings, we recommend that you check out other solutions listed below. If nothing fixes the problem, proceed to reset your device’s network settings.
2. Check Date & Time Settings
Having the wrong date & time settings could also prevent your Windows computer from connecting to Netflix’s server. Check that your PC is configured to automatically update its date and time settings.
Step 1: Launch the Windows Settings menu and select ‘Time & Language.’

Step 2: In the ‘Date & time’ section, make sure ‘Set time automatically’ and ‘Set time zone automatically’ are both toggled on.
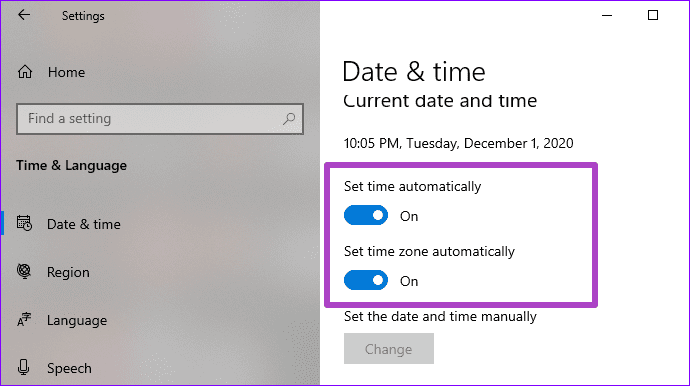
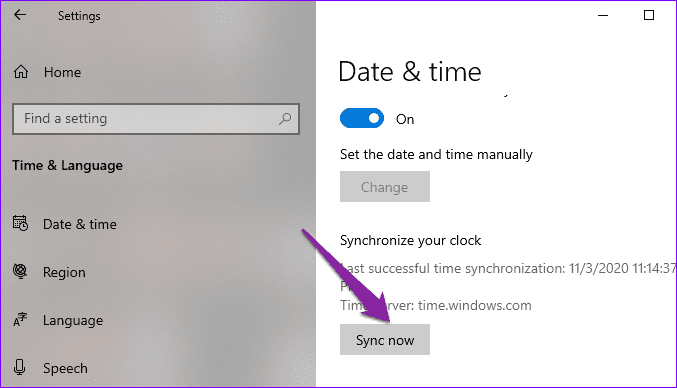
You should also try syncing your PC’s clock with the Windows Time Server . To do this, scroll to the bottom of the ‘Date & time’ menu and click the Sync now button.
3. Restart Computer
Are you still getting the T1 error message with the Netflix app? Power off your computer and turn it back on. That would refresh your PC and possibly eliminate any system and network-related glitch, causing Netflix to malfunction. If that also proves abortive, it’s time to try more drastic troubleshooting measures.
4. Reinstall Netflix
You will have to re-download the app and re-enter your account credentials, but you can certainly try reinstalling Netflix. Go to Settings > Apps and click on Netflix in the ‘Apps & features’ section. Next, click the Uninstall button to remove the Netflix app from your computer.

Restart your PC and reinstall Netflix from the Microsoft Store or simply click the button linked below.
Get Netflix — Microsoft Store
To an Error-Free Netflix
You must’ve felt that these solutions recommended above might seem like a lot of work (it actually is — especially troubleshooting your internet). We’re positive that at least one of the fixes should resolve the error. When you’ve finally fixed the error, you can check our compilation of popular and classic suspense movies on Netflix . We bet you’d find something engrossing to watch. Also, drop a comment in the section below if you’ve figured out another solution or need further assistance regarding the error.
Next up: Looking to change the Netflix download location on Windows 10 PC? Check out the article linked below for a simple solution.
Was this helpful?
Every keyboard, whether external or laptop, comes with a print screen button abbreviated as PrtScr. Pressing the print screen button will capture the whole screen that you can later paste in an app like Paint . It is one of the fastest ways to take a screenshot on Windows. For some users, PrtScr key is unresponsive or just not working. In that case, you can use a keyboard shortcut or an app for taking screenshots. Why would you do that when you have a dedicated screenshot key on the keyboard?
The print screen is a universal button that’s available on all Windows 10 computers and works the same way. Typically, it is located at the top row after the function keys. Way before browser extensions and third-party apps were available, there was a print screen option, and many people still prefer to use it because it’s quick and works everywhere. So when it stops working, that inconvenience often irks.
Let’s find how we can fix the print screen not working error on your Windows 10 computer.
1. Use Keyboard Shortcuts
There are other ways to take screenshots using a combination of PrtScr buttons. Try using Alt+PrtScr shortcut instead. That will take a screenshot of the currently selected window instead of the whole screen—no need to crop or remove unwanted background now.

When you use the Windows key+PrtScr shortcut, the screenshots of the fullscreen gets saved to the Pictures > Screenshots folder. If you use a keyboard or a laptop with Fn key, then you are in luck. You can use it along with Windows or Alt key combination.
Some keyboards come with an F Lock key instead of the Fn key. If that’s the case, you don’t have to press and hold it. Just press it once to activate it as you do with caps lock.
Pro Tip: Press Windows key+Shift+S to launch a new, flexible way to take screenshots. Your screen will fade, and you will notice a floating bar at the top. Use your mouse to select an area on the screen to take a screenshot of. The feature was earlier part of OneNote, but Microsoft included it with the Windows 10 Creators Update.
2. Taken Over as a Third-Party App Shortcut
The shortcut may have been associated with a third-party app like Dropbox, as noted by one user named gbbay in Microsoft support forums. It could be an app that you recently updated or installed. So, check if any third party app has taken over it.
3. Keyboard Hardware
Did you try with another keyboard? There may be something wrong with your current keyboard, and it needs fixing . Make sure everything is working with keyboard hardware and software. Connect your keyboard to another computer to check or borrow a friend’s keyboard for your computer instead. At times, the USB port may not be able to detect the keyboard properly.
4. Hardware Troubleshooter
All Windows 10 editions come with a hardware troubleshooter that will check for errors in external devices like mice, keyboards, printers, etc.
Step 1: Press Windows key+I shortcut to launch Settings. Once it opens, search for ‘Find and fix keyboard problems’ and click to open it.

Step 2: Select ‘Apply repairs automatically’ option at the bottom and click on Next to continue.
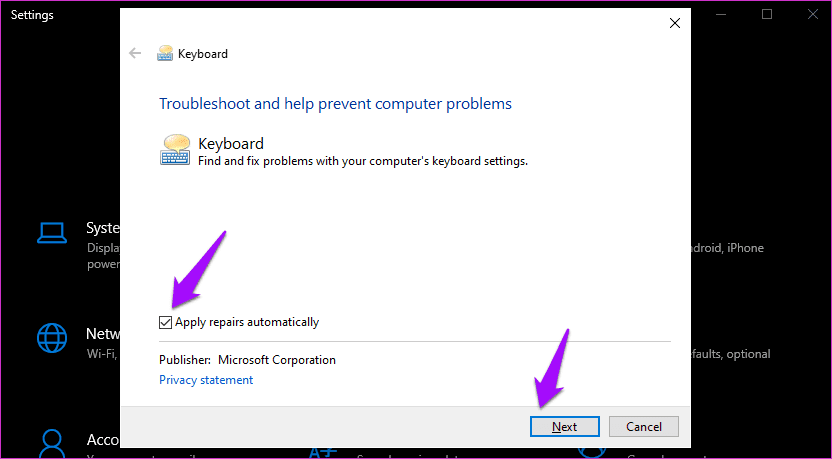
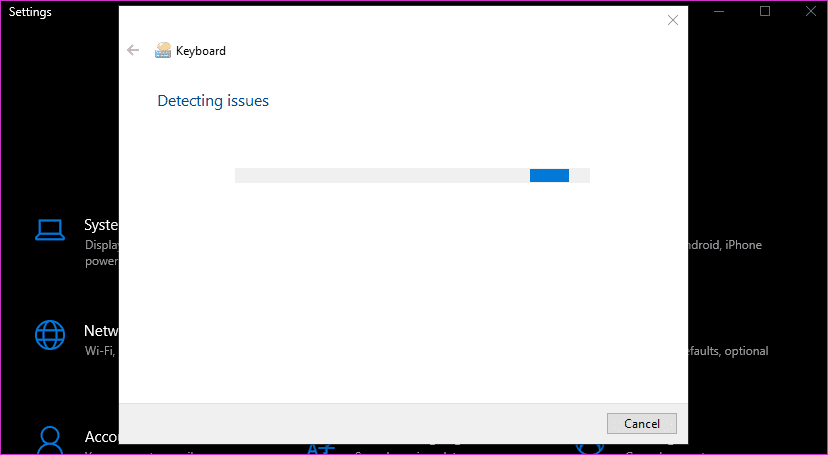
Windows will now look for problems and suggest a solution as required. It will then apply the solution if within its rights.
5. Registry Editor
Unlike Group Policy Editor, which comes preinstalled in Windows Pro and higher versions only, Registry Editor is available in Windows Home.
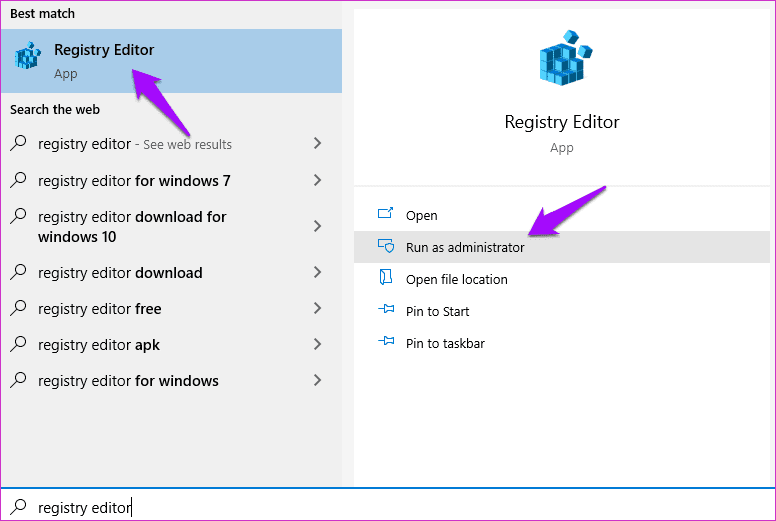
Step 1: Search for and open it from the Start menu. Make sure you run it with admin rights, as shown in the screenshot below.
Step 2: Drill down to the folder structure below.
HKEY_CURRENT_USER\Software\Microsoft\Windows\CurrentVersion\Explorer
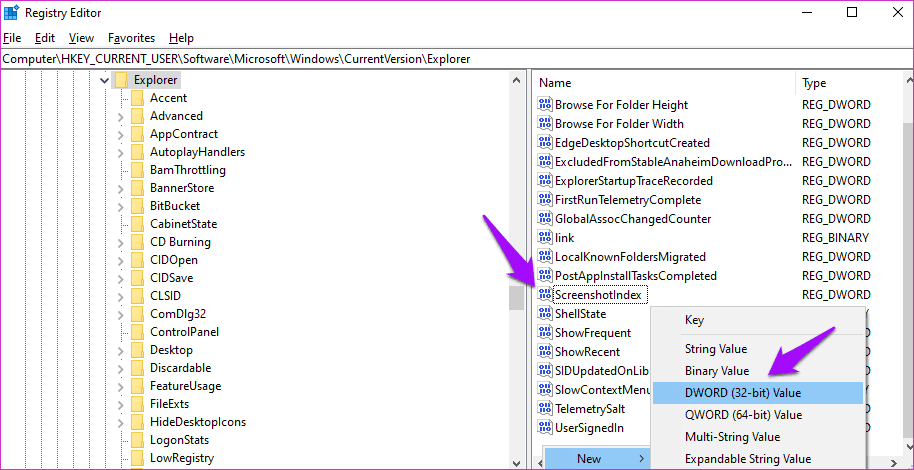
Step 3: Find a file named ScreenshotIndex in the right pane of the window. You don’t have to do anything if the file already exists. If the file is missing, right-click on a space in the right window-pane and select DWORD (32-bit) Value under New. I have the file, as shown in the screenshot below.
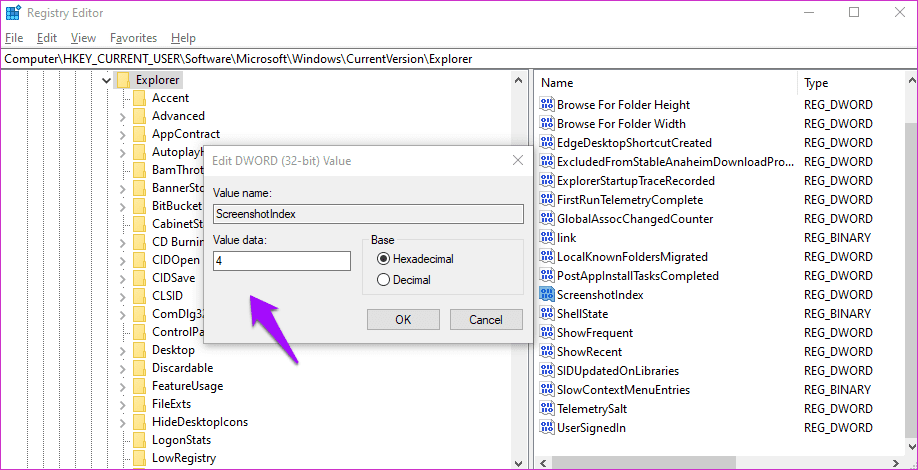
Step 4: Name the newly created file as ScreenshotIndex and double-click to open it. The Hexadecimal Value data should be set to 4.
Step 4: Navigate to this folder now.
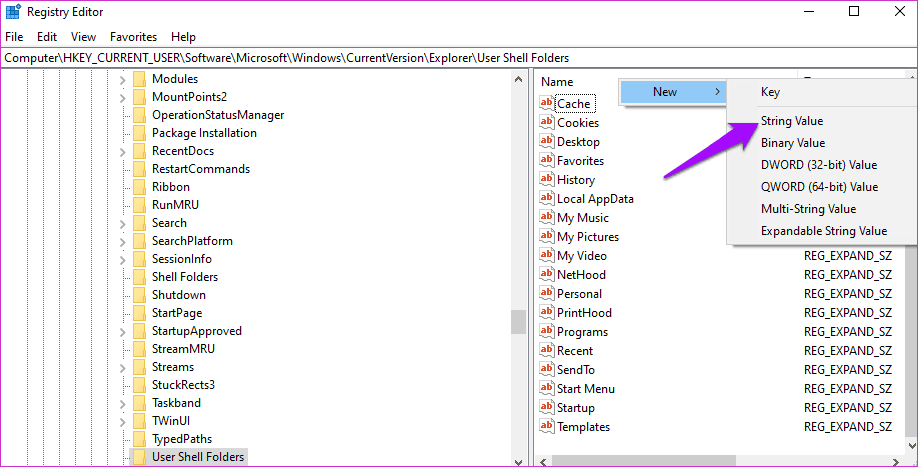
HKEY_CURRENT_USER\Software\Microsoft\Windows\CurrentVersion\Explorer\User Shell Folders
Step 5: Locate and open this file.
{B7BEDE81-DF94-4682-A7D8-57A52620B86F}
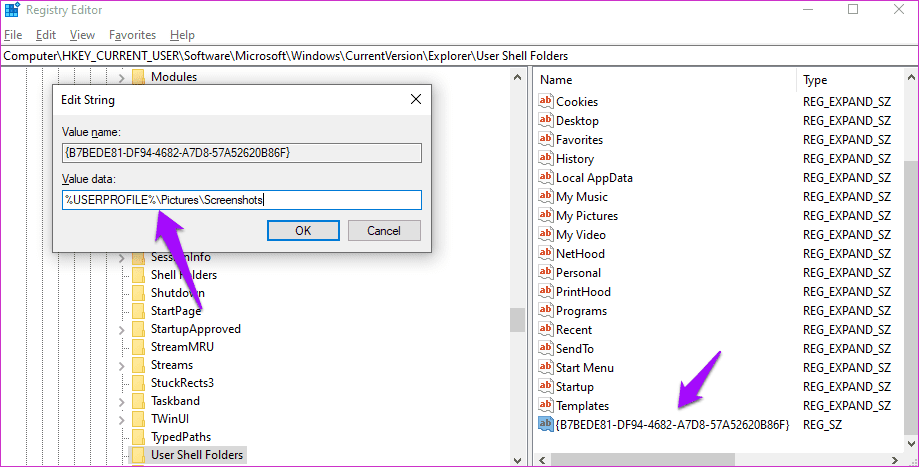
Step 6: Double-click on the file to ensure that the Value data is set to %USERPROFILE%\Pictures\Screenshots . If the file is missing, create a String Value file instead of the DWORD file as we did above and enter the value as discussed.
If that doesn’t work, try 695 instead of 4 as the value in step 4 and try again.
6. Try Third-Party Apps
There are plenty of apps available that you can use to take screenshots. Microsoft has been offering the Snipping Tool for years now. Then there are browser extensions that you can use with additional built-in features like screen recording.
Put It on the Screen
I continue to use the print screen feature on my Windows 10 laptop. It helps me take screenshots of screens where other apps don’t work. For example, the Start menu. It disappears the moment you click on anything else. The print screen feature solves this issue, but so does some other apps and options discussed above.
Next up: Are you using a multi-monitor setup? Click on the link below to learn how to take screenshots on a specific monitor on Windows 10.
